No Server? Your Desktop Is the Server
Where your data lives is a fork in the road when you pick a tool. SaaS is the convenient path: sign up and go, nothing to maintain, at the cost of your data sitting on the provider's servers. UnDercontrol will offer that hosted option too. But if what you want is full data self-custody — tasks, notes, and ledgers stored only on your own devices, where backup means copying a file and migration means moving to another machine — this tutorial is for you.
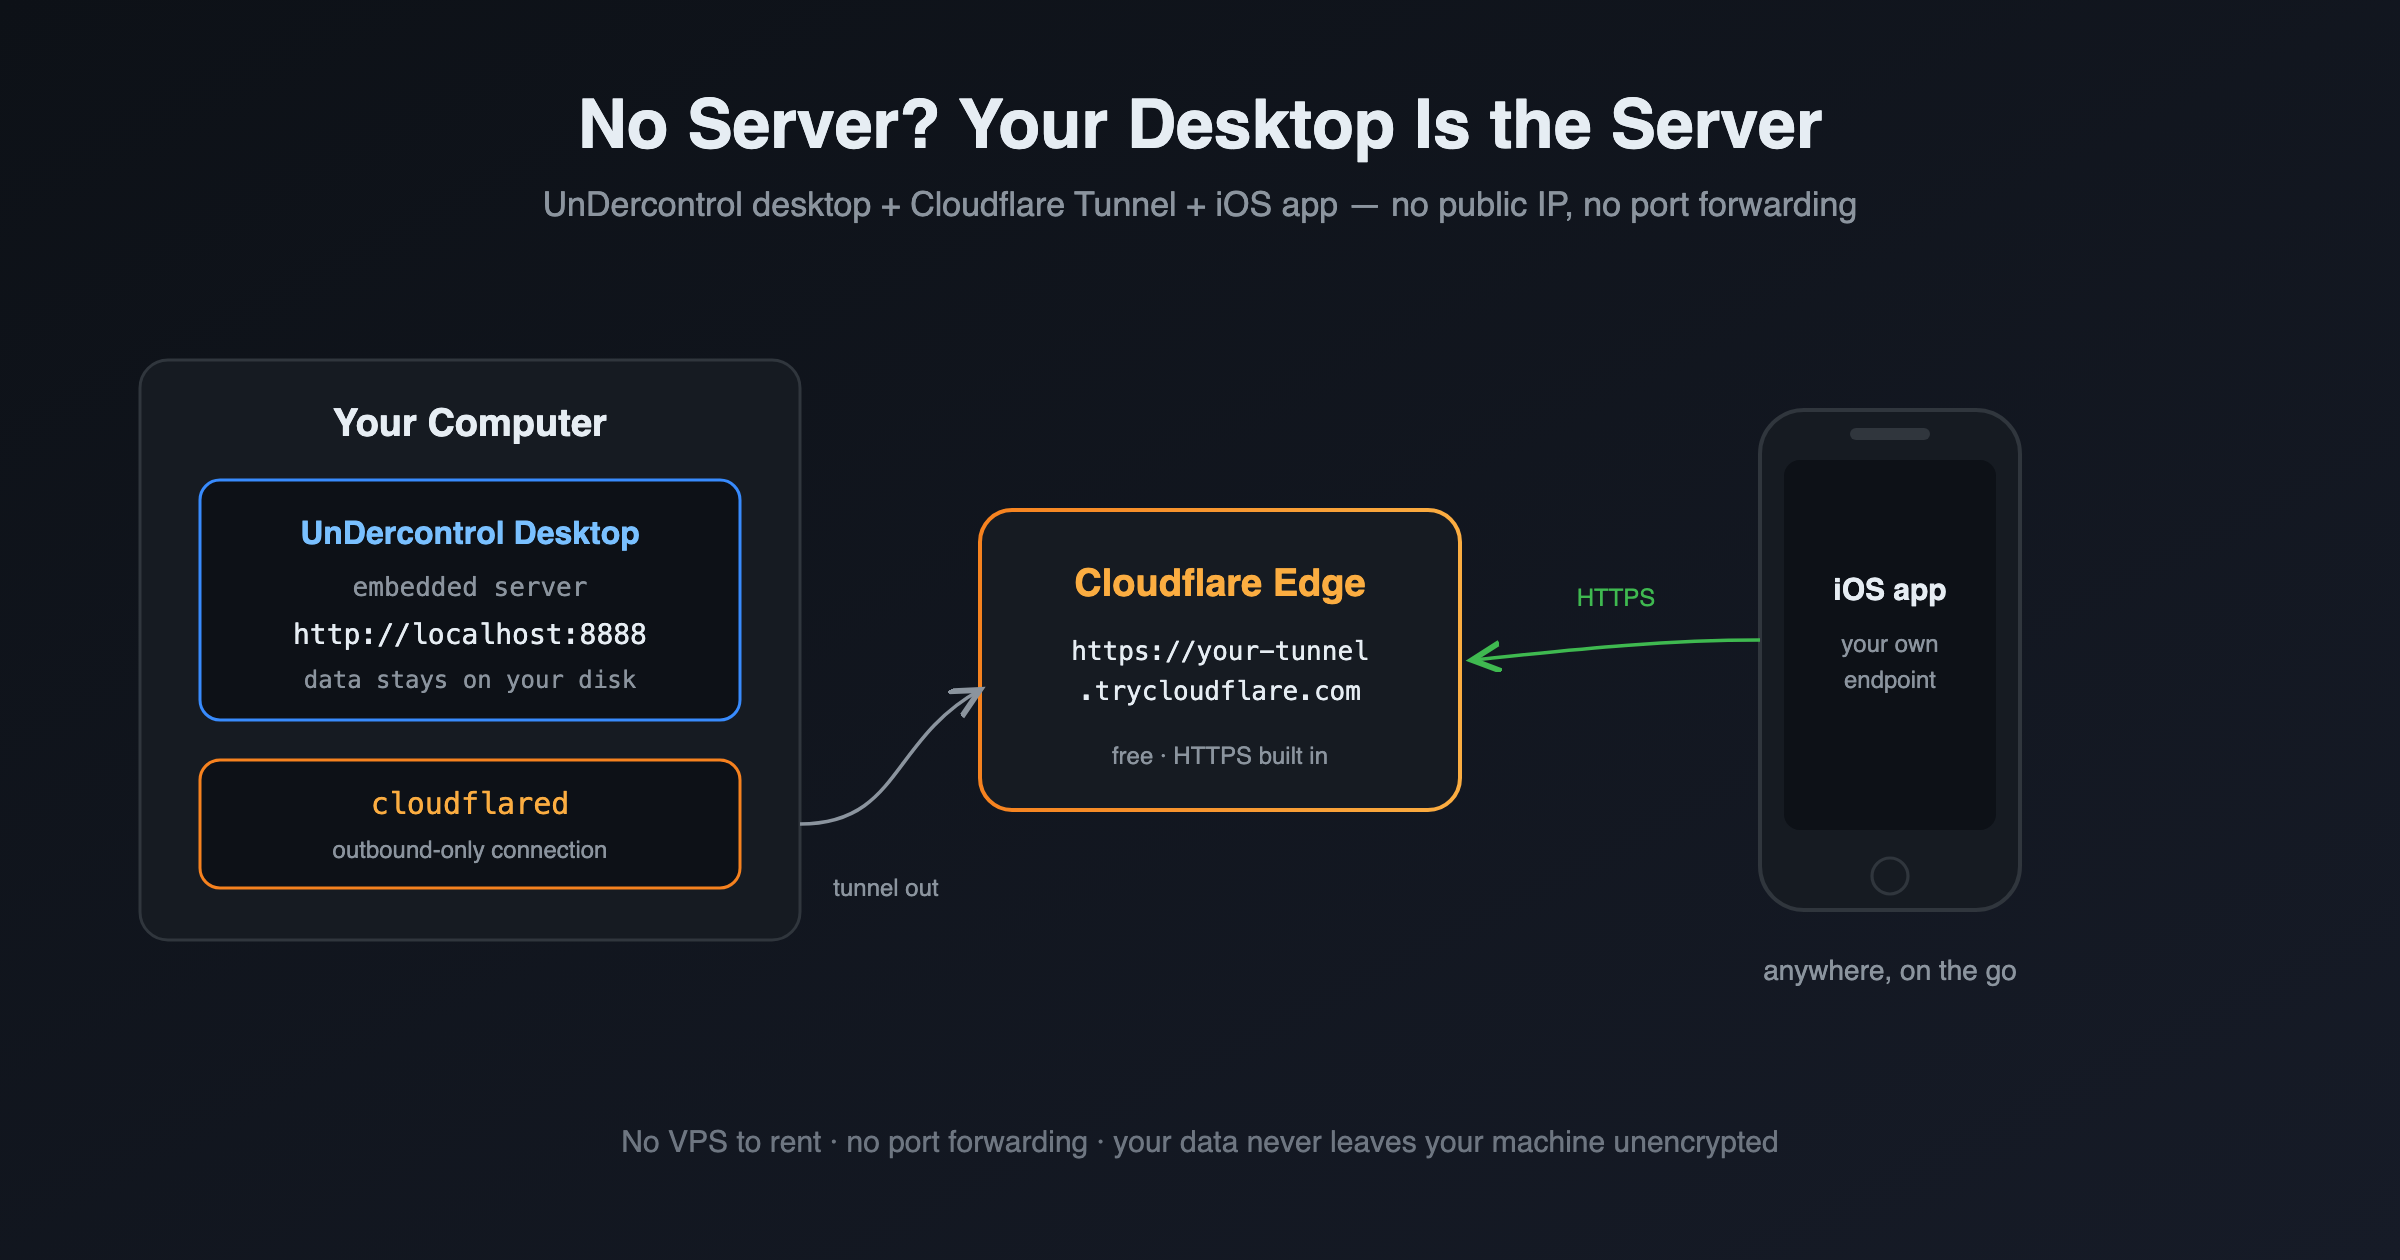
Self-custody usually means running your own server, and that is exactly where most people give up. Here is a zero-cost path that skips the server entirely: the UnDercontrol desktop app ships with a full backend and keeps your data in a SQLite file on your own disk; Cloudflare Tunnel exposes that machine to the internet for free; the iOS app connects straight to your own endpoint. Check tasks, jot notes, and log expenses from the subway, while the data itself never lives anywhere but your computer. No public IP, no router port forwarding, and no domain to buy (optional, only if you want a fixed address).