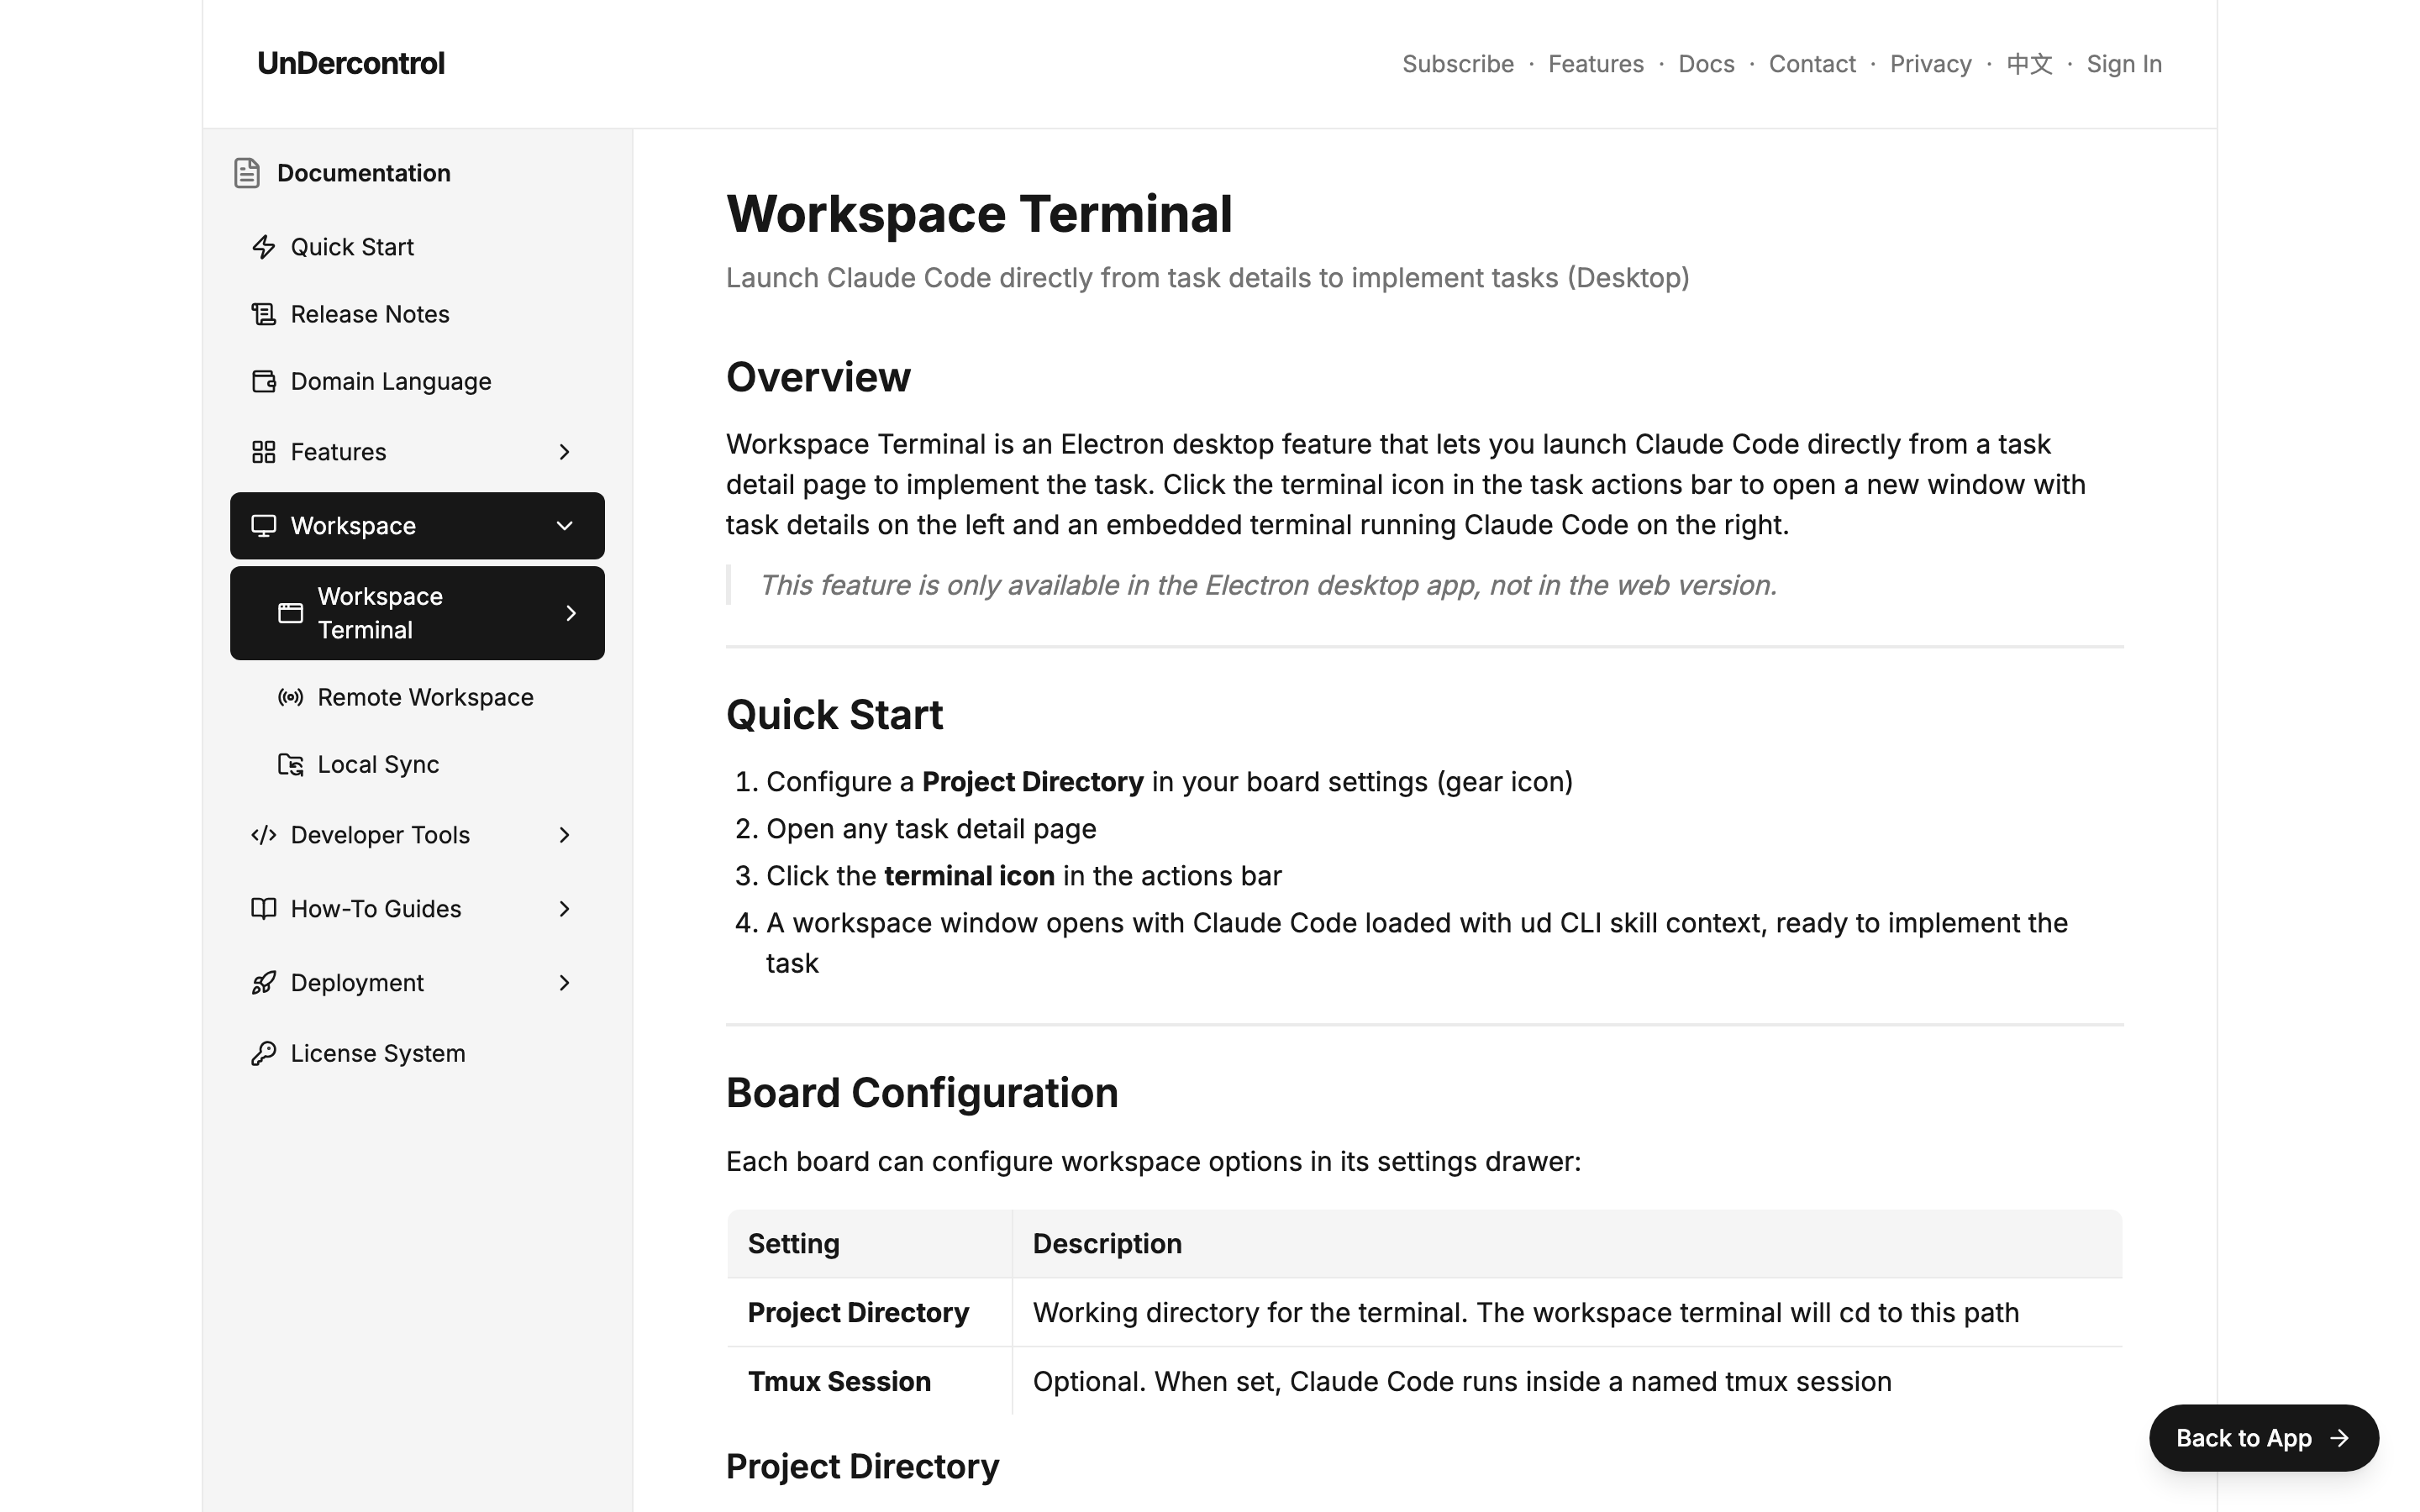
Kanban Board Filters: 4 Levels from Broad Scope to Laser Focus

· 6 min read
Creator of UnDercontrol

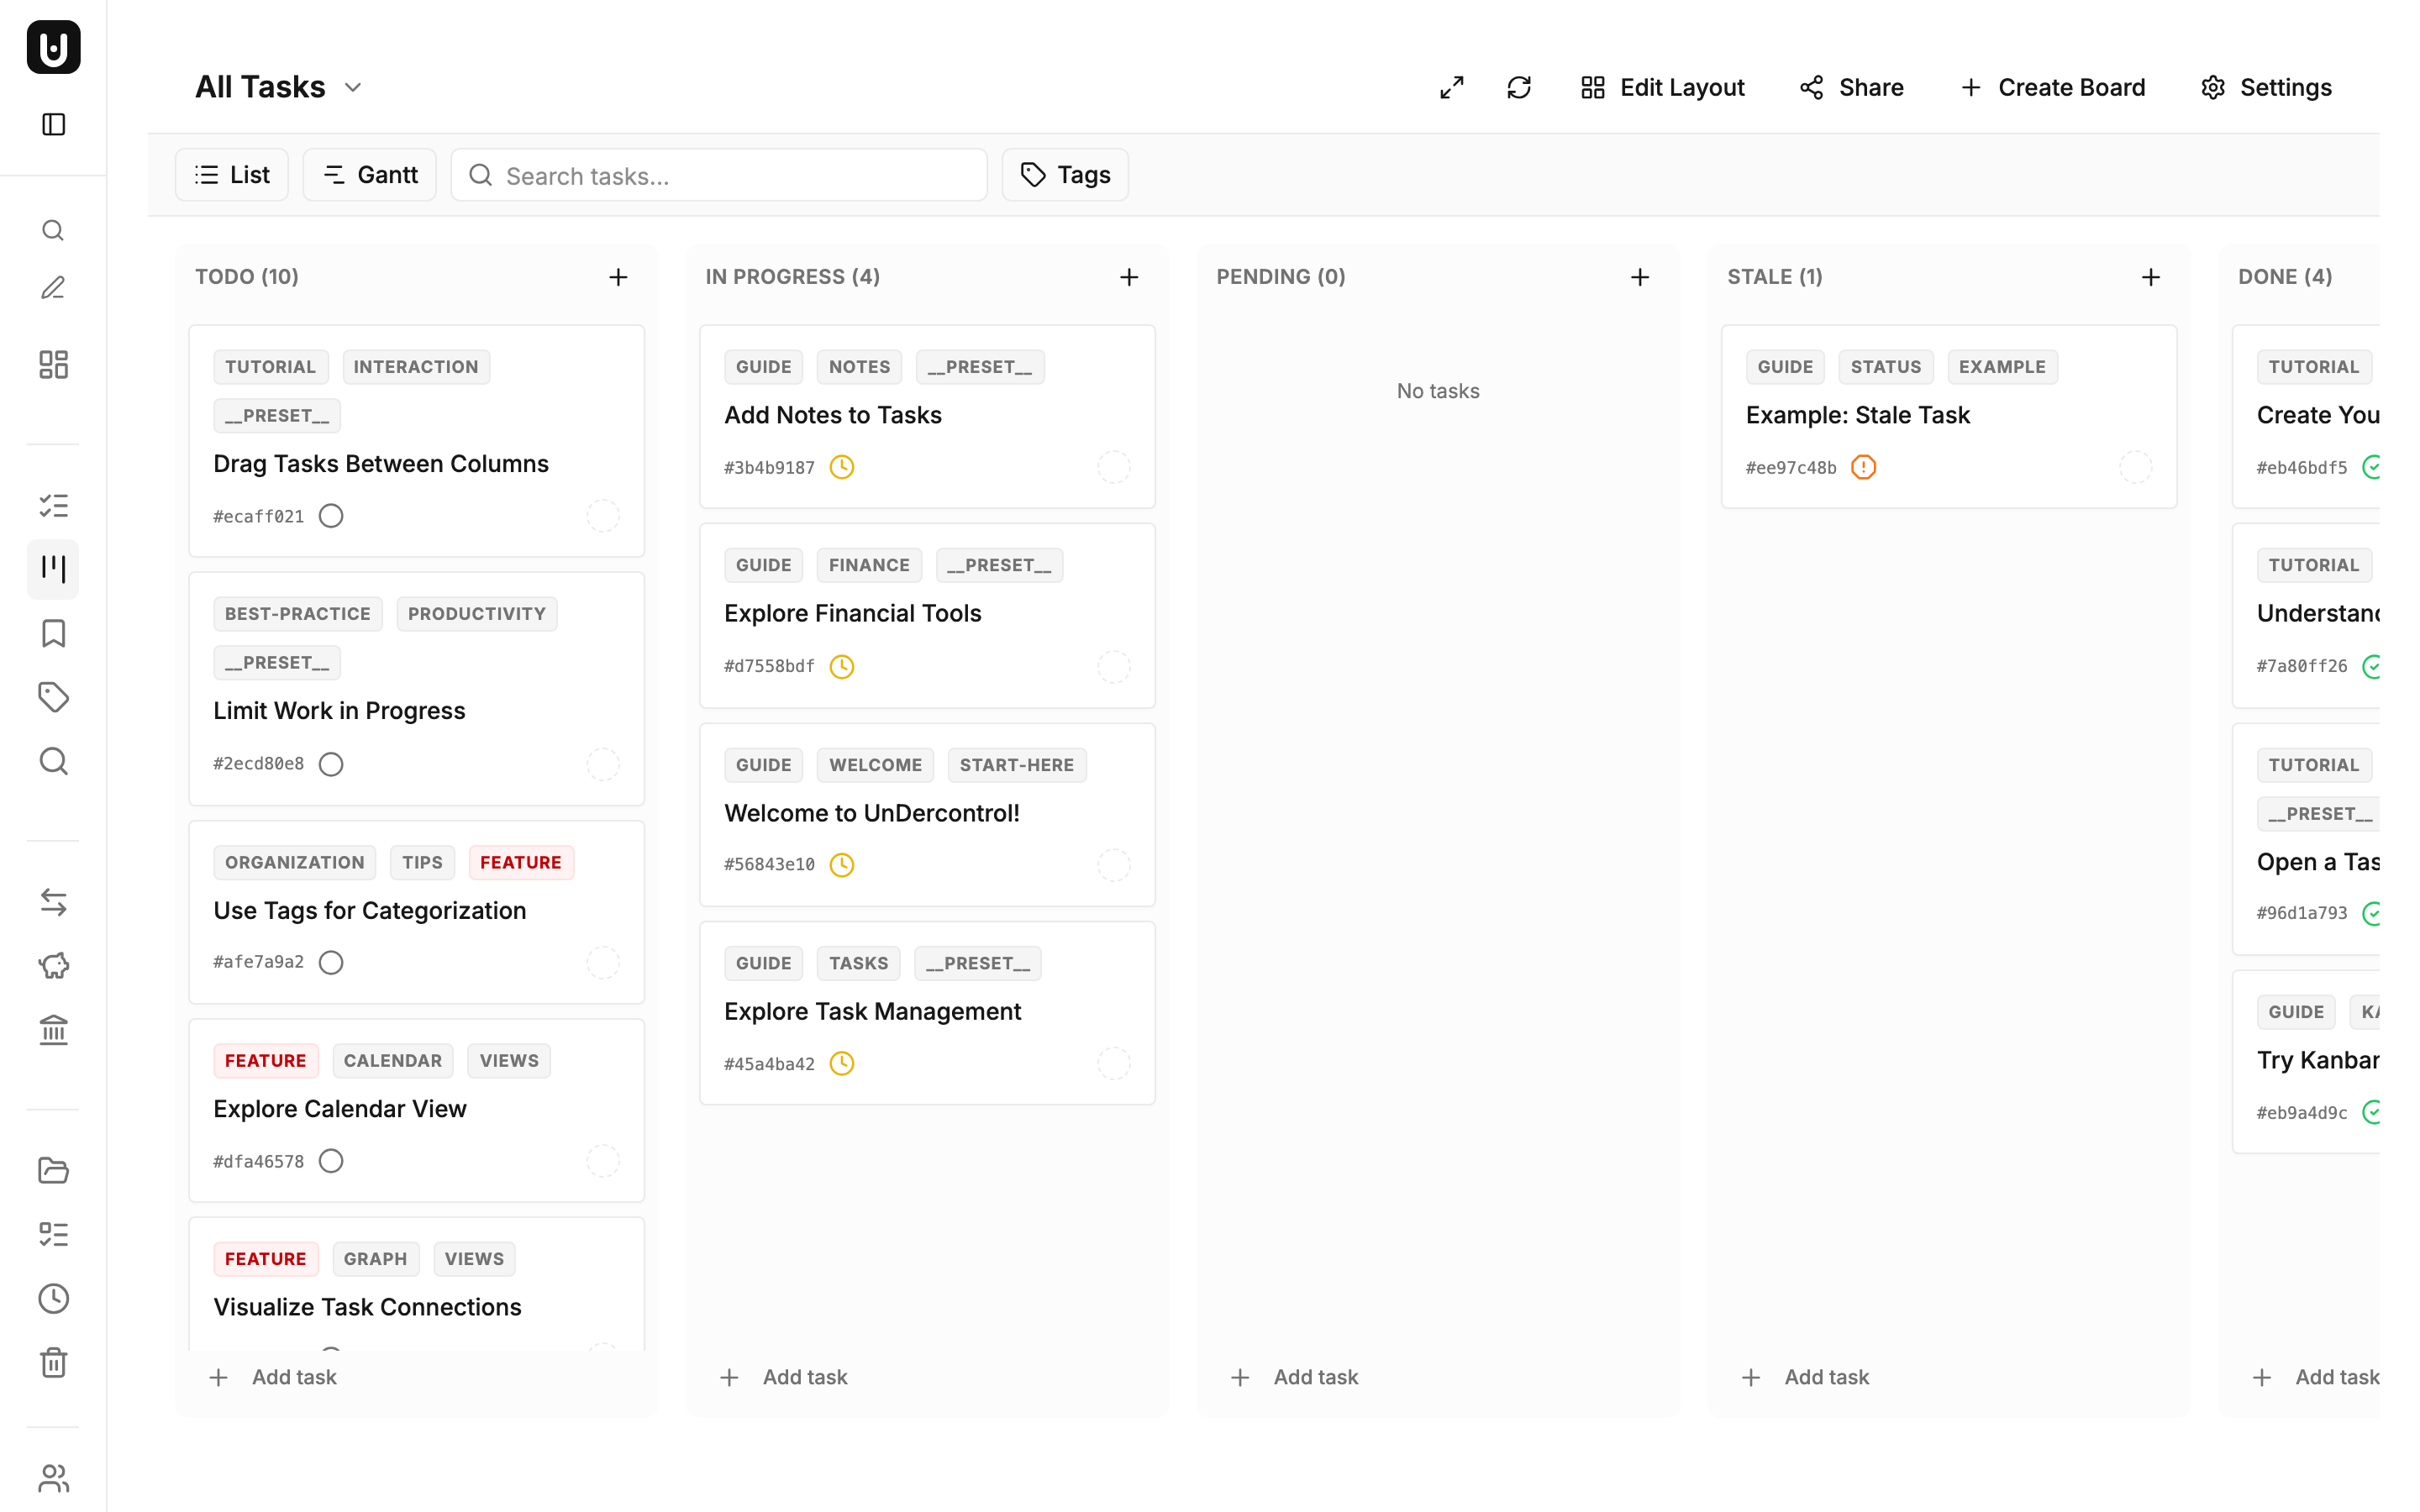
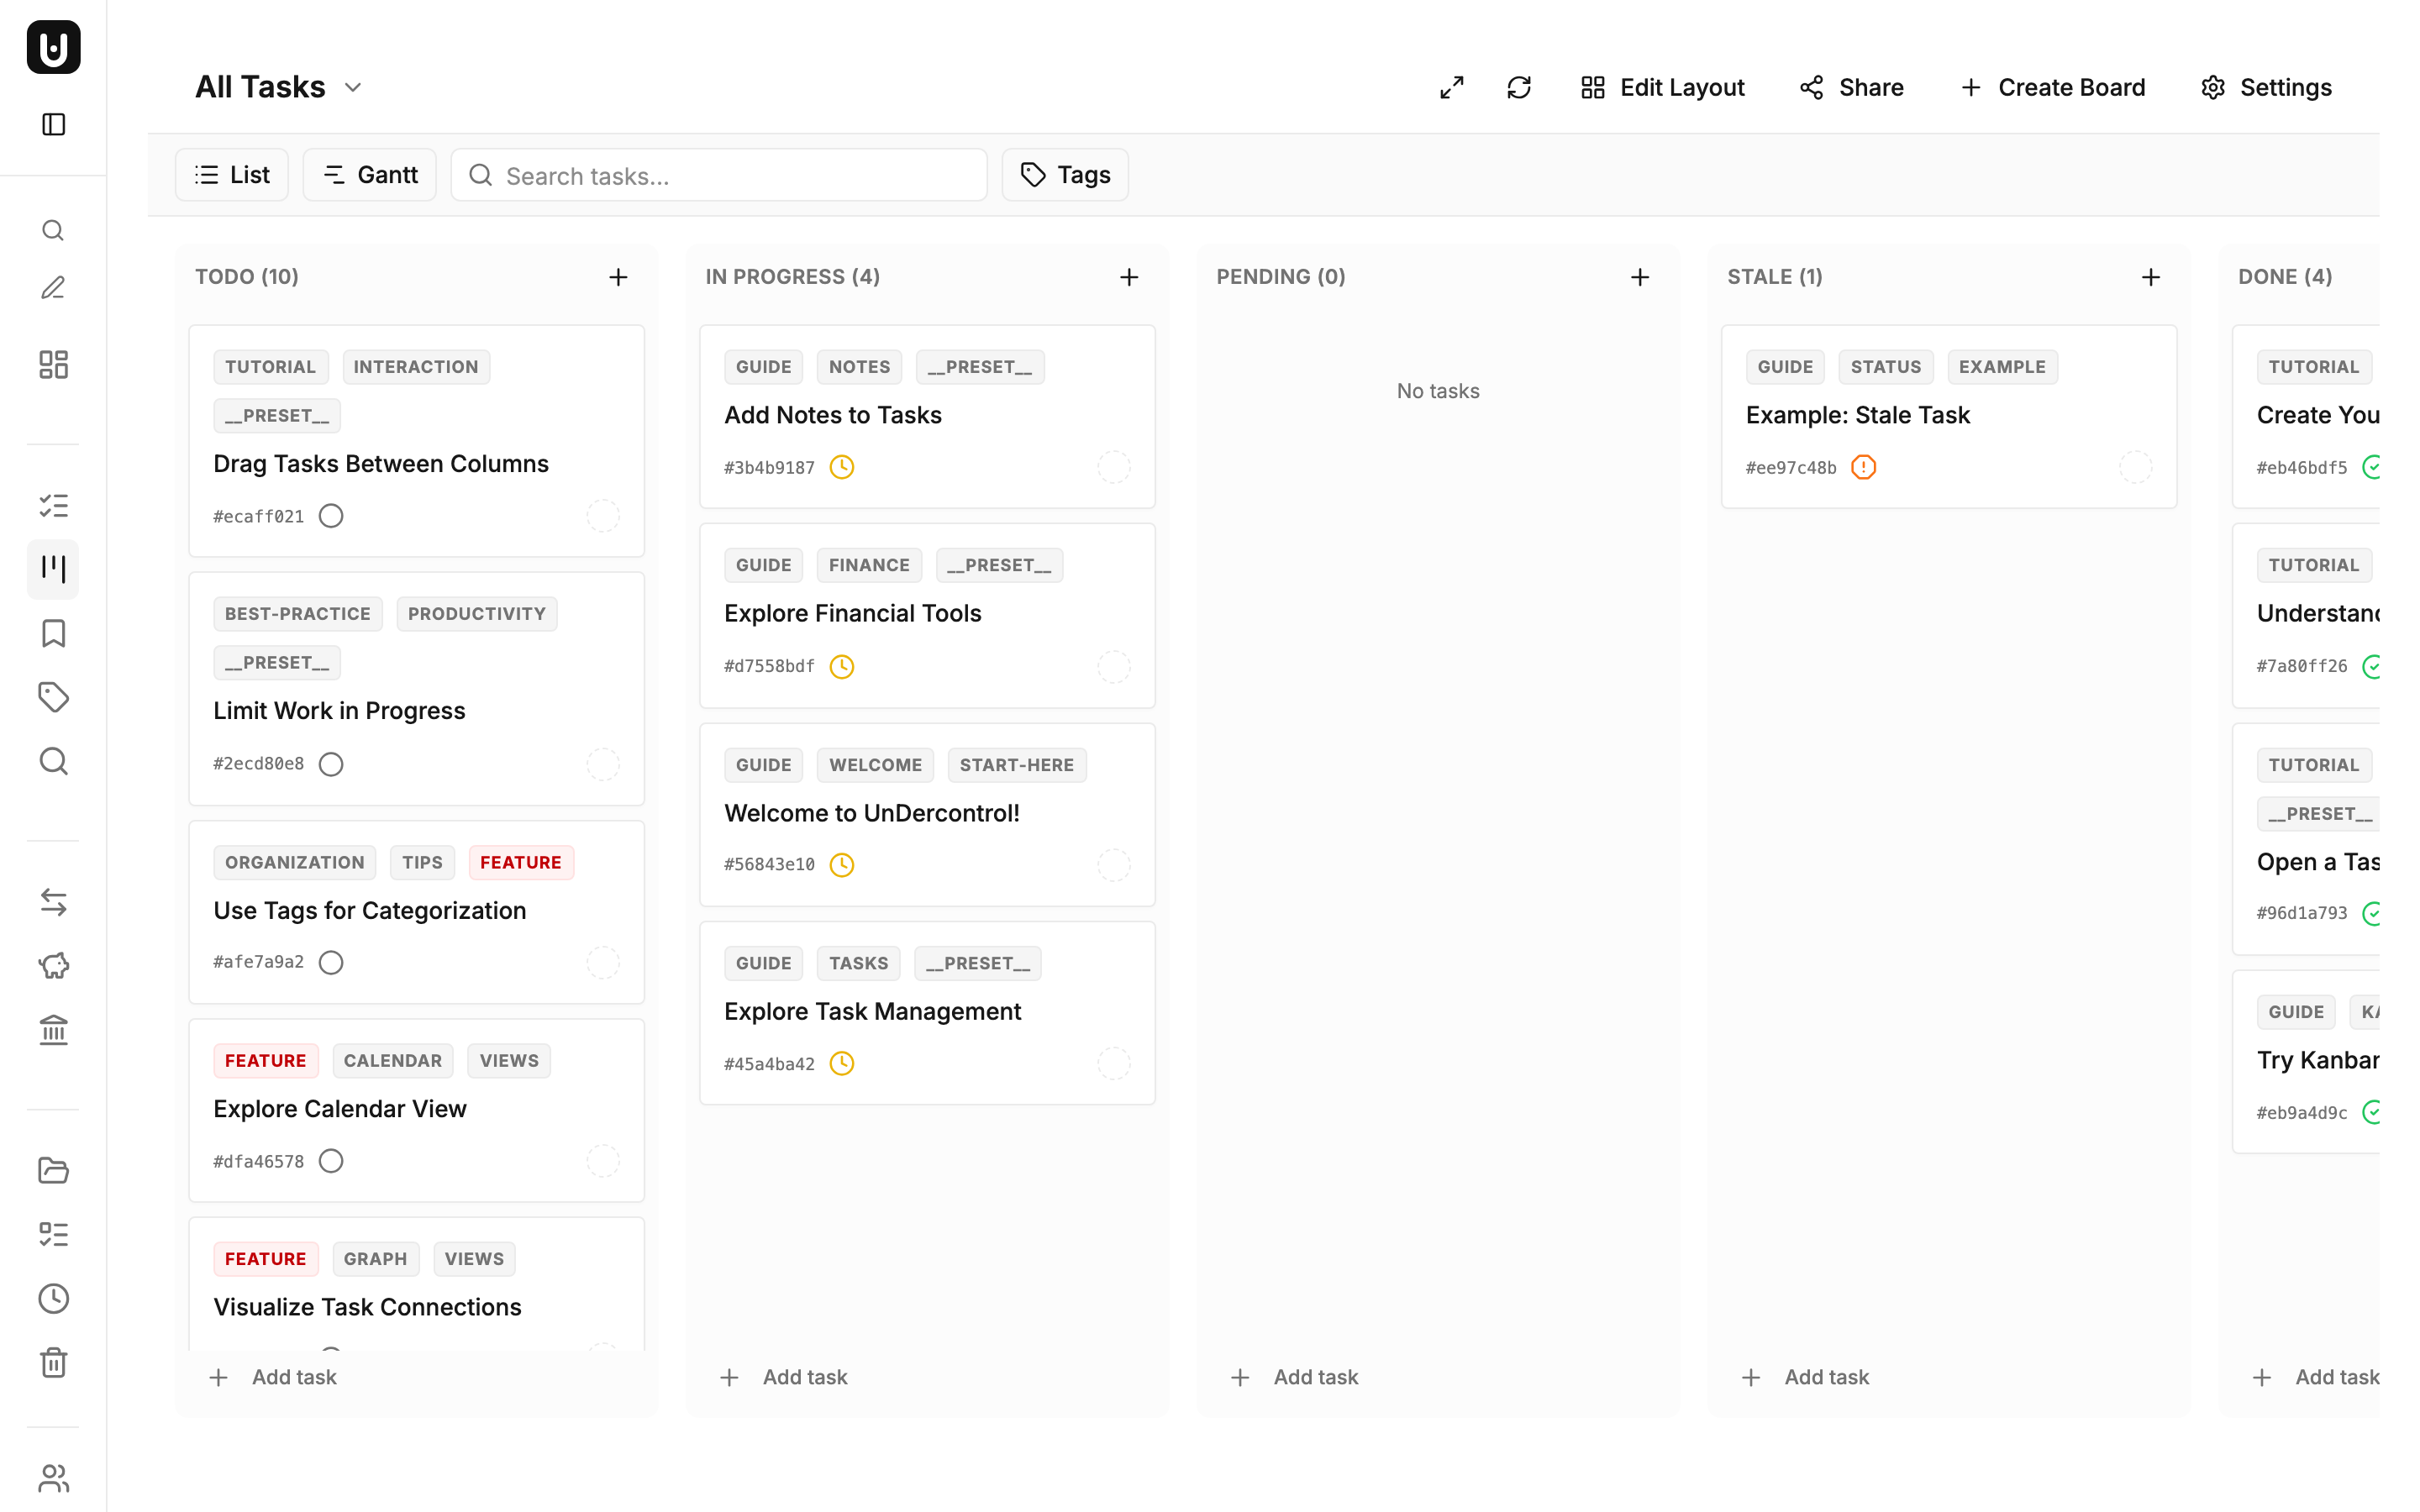
When you have dozens or hundreds of tasks, the kanban board needs to be more than a flat dump of everything. UnDercontrol's kanban boards use a layered filtering system that narrows your view step by step — from the broadest scope down to a real-time search. Understanding these four levels will change how you organize your work.

Reusable AI Skills — Prompt Templates You Own

· 5 min read
Creator of UnDercontrol

If you've spent any time working with AI assistants, you've probably built up a mental library of prompts that actually work. The refactoring prompt that always gets clean output. The commit message template that matches your team's style. The bug-triage checklist you paste in every time something breaks in production.

The problem is those prompts live in your head, or a sticky note, or buried in a Notion doc nobody remembers to open. UnDercontrol's skills system fixes that.

What Are Skills?

Skills are named, reusable prompt templates stored inside UnDercontrol. Each skill has a slug (e.g., refactor-ts, daily-standup, pr-review), a markdown body, and belongs to a group. That last part matters — skills are group-scoped, so a team can share a library of prompts without everyone maintaining their own copy.

You can create and edit skills through the web UI, manage them from the CLI, or apply them declaratively from a YAML file. The markdown content supports the full range of prompt structures: instructions, variables, multi-step workflows, whatever your use case needs.

Creating a Skill

From the web editor, creating a skill is about as straightforward as writing a note. Give it a name, a slug, and write your prompt in the markdown editor. Save it, and it's immediately available to everyone in the group.

From the CLI, you can apply a skill definition the same way you'd apply a task — as a markdown file with YAML frontmatter:

ud apply skill -f pr-review.md

Your file might look like this:

---
name: pr-review
description: PR Review Checklist
tags:
- ai
- development
---

Review the following pull request diff and provide feedback on:
- Logic correctness
- Error handling
- Test coverage
- Naming and readability

This makes skills portable. Check them into your dotfiles repo, version them with the rest of your configuration, and deploy them to a new UnDercontrol instance with a single command.

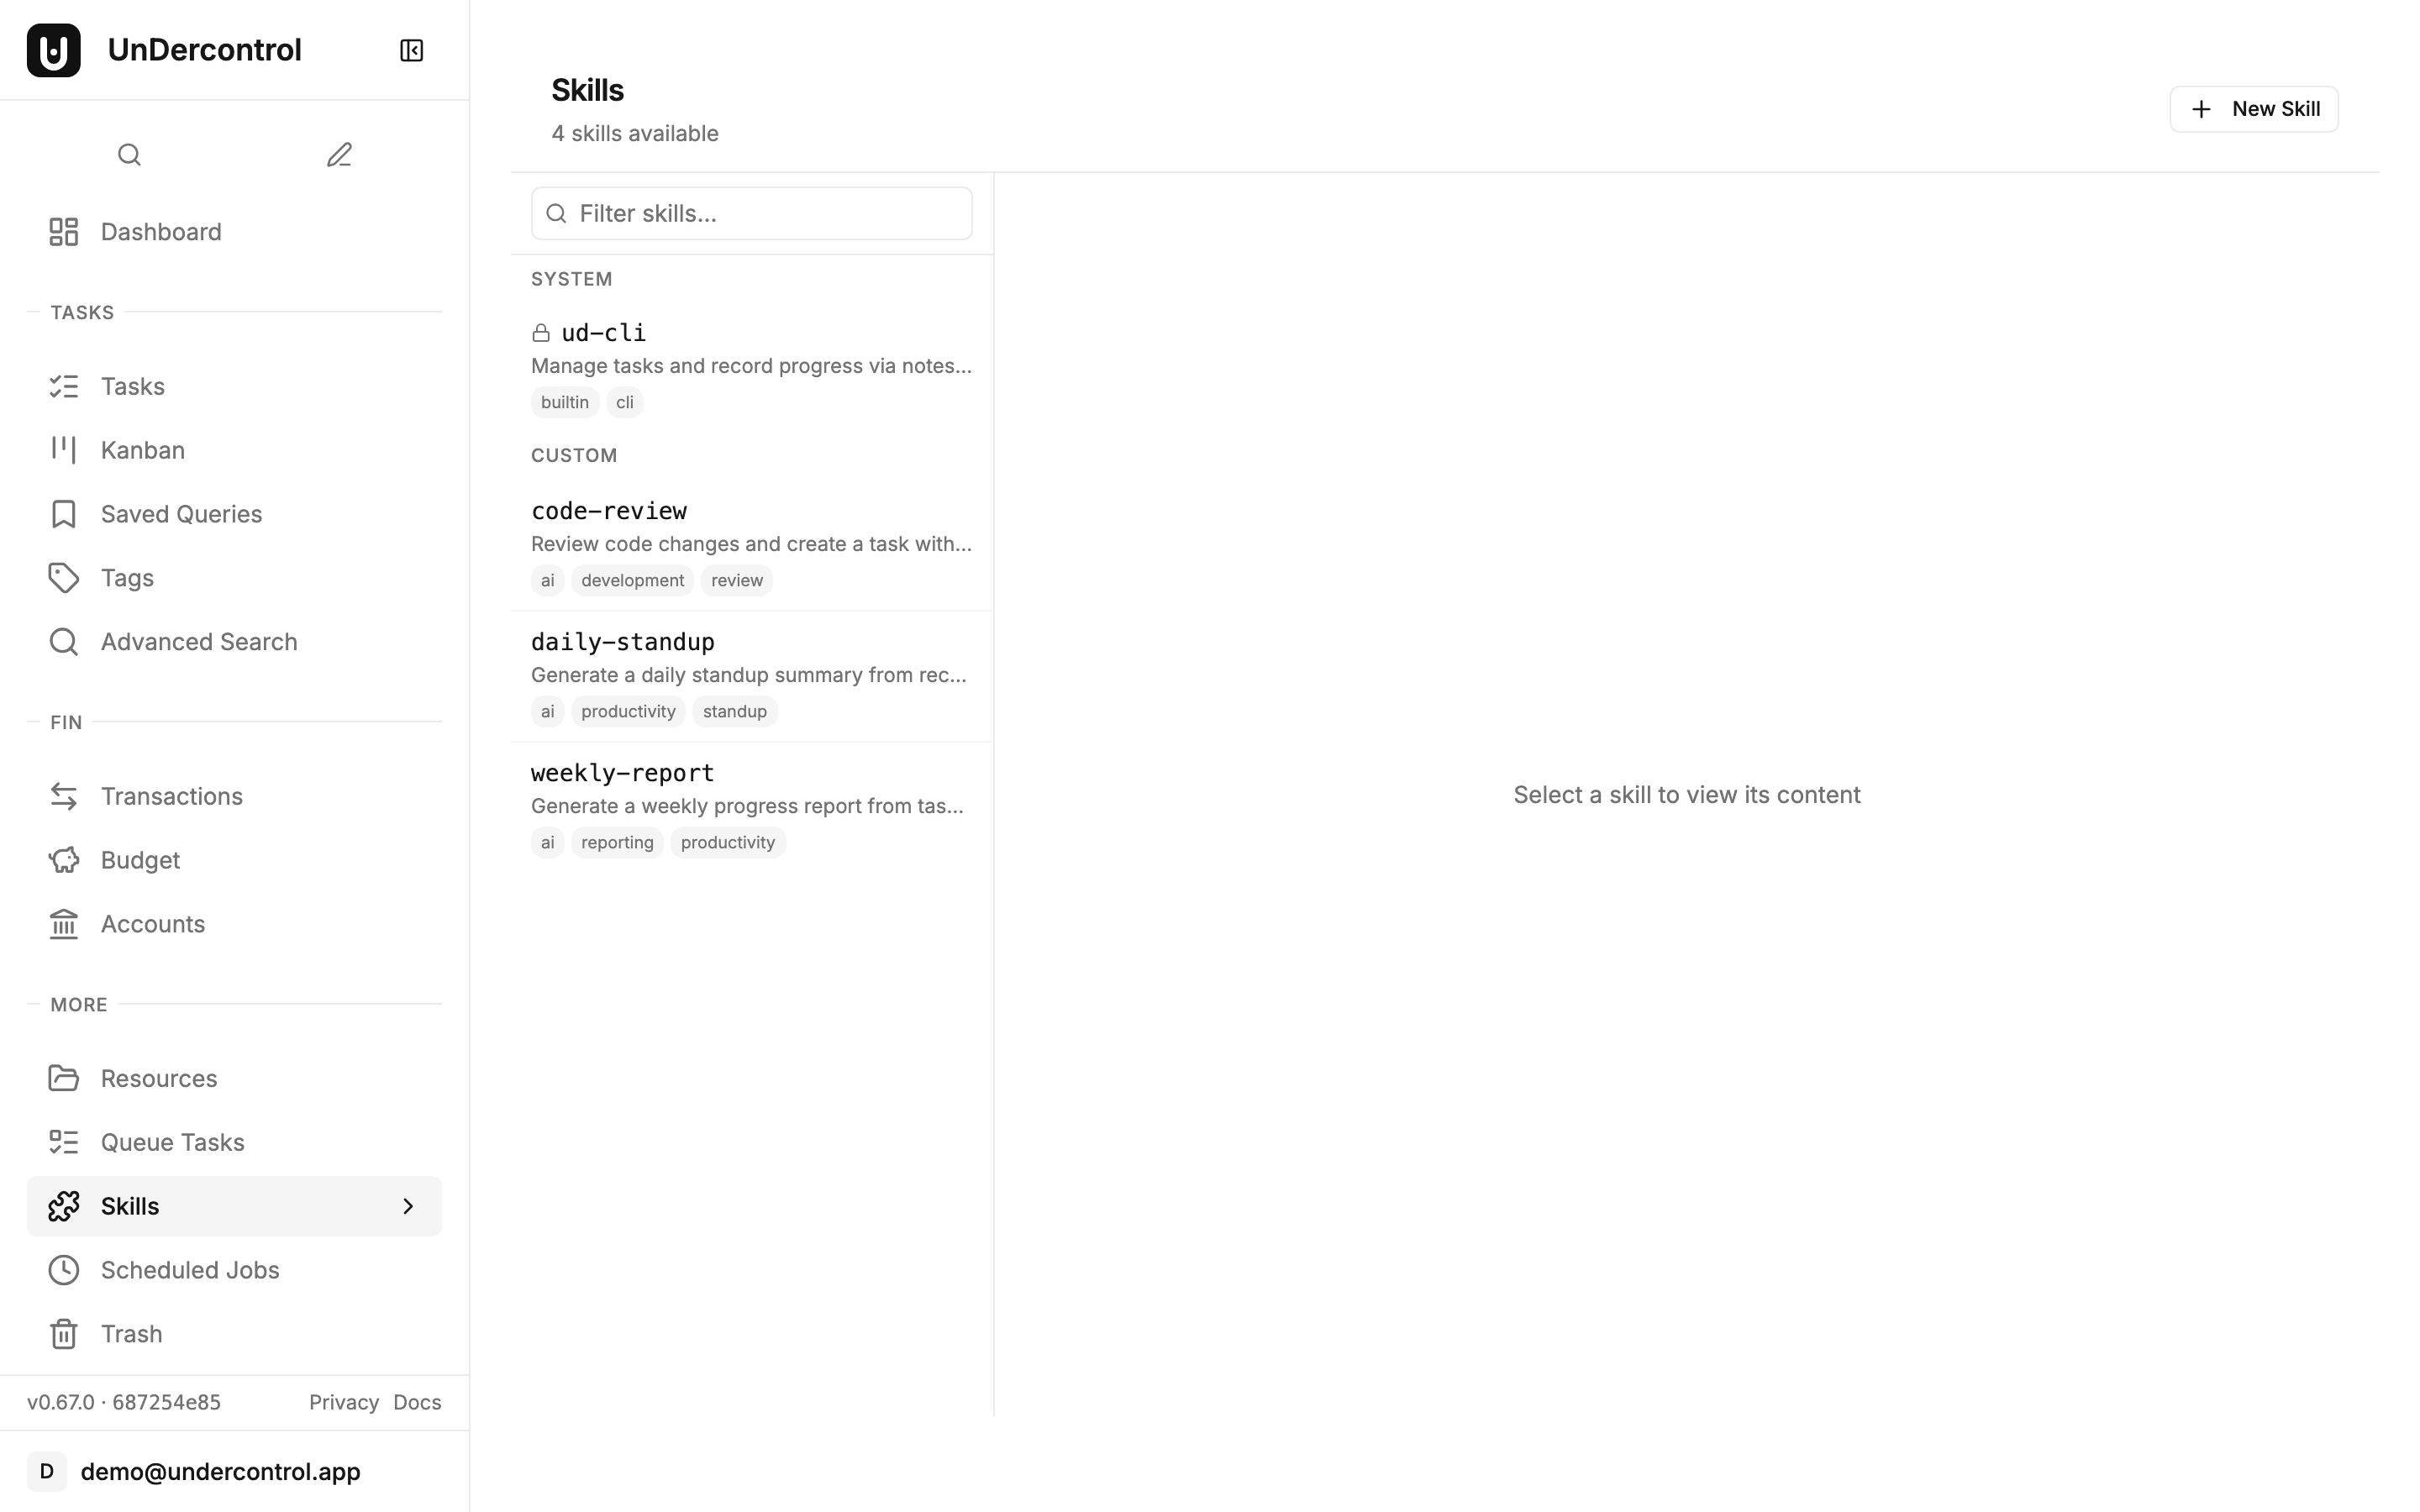
Skills page showing system and custom skills with search and tags

Using a Skill — The ud prompt Command

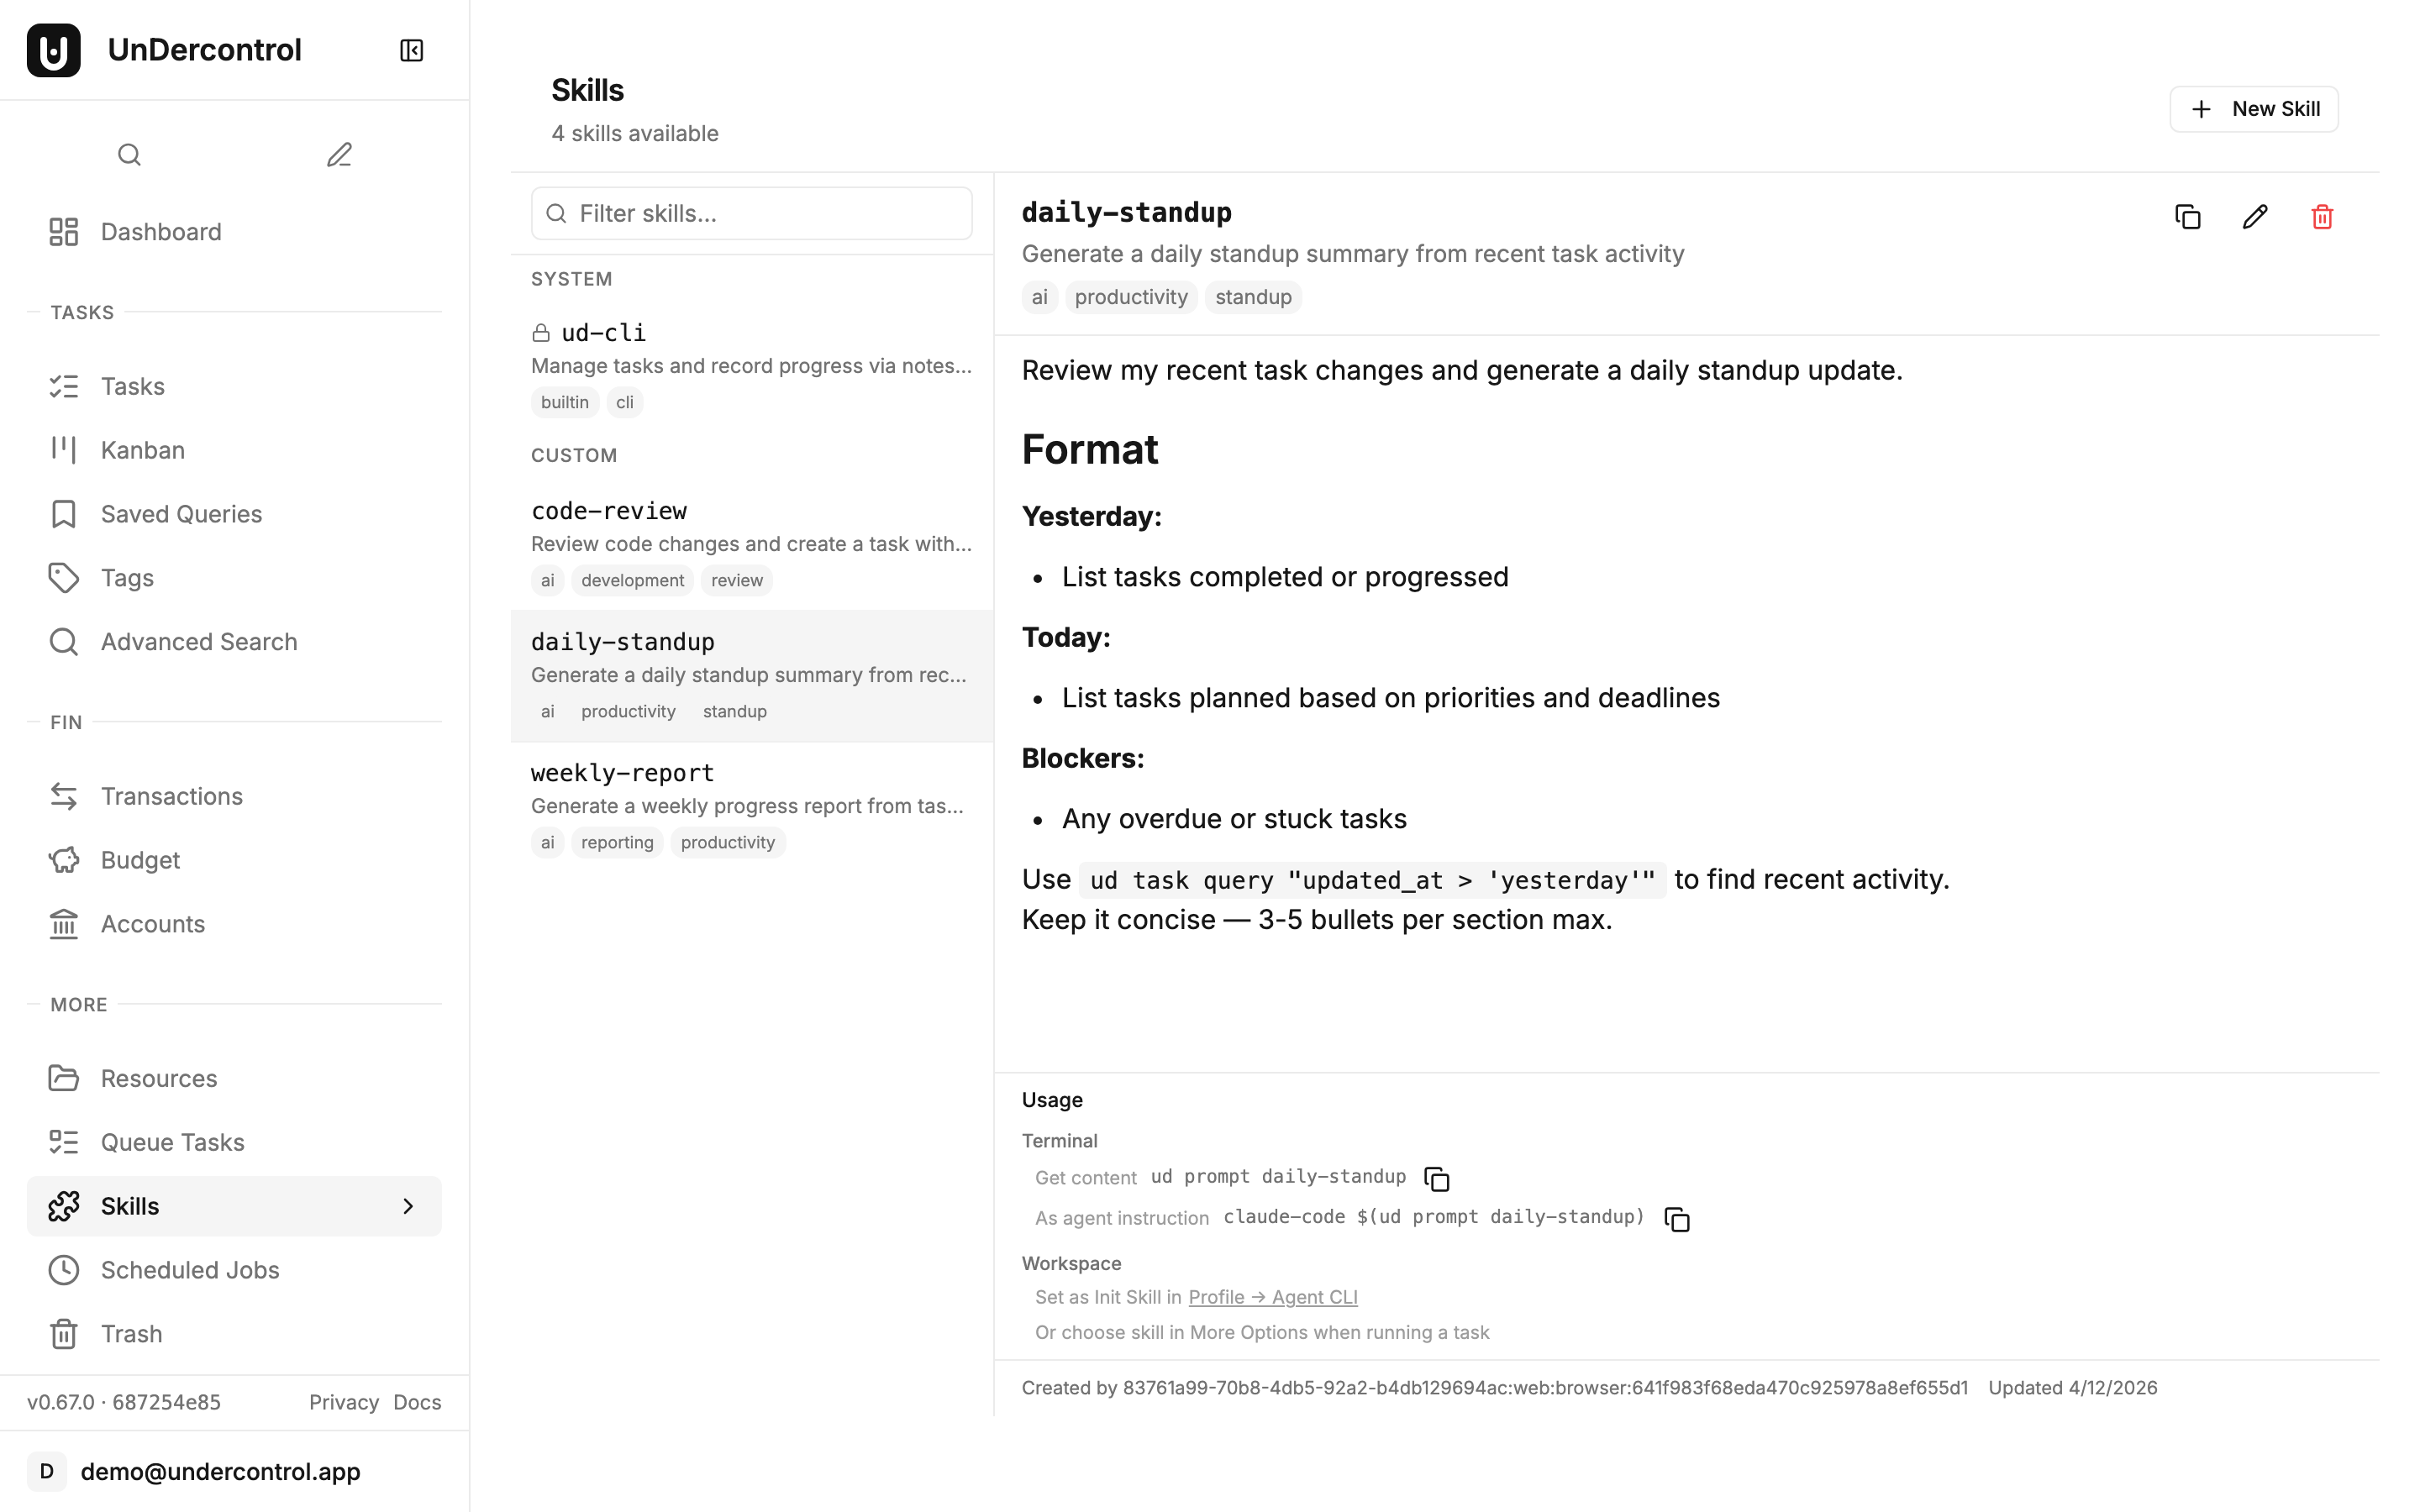
The real payoff is how you consume skills. The ud prompt command fetches a skill by slug and outputs its content to stdout. From there, you can pipe it anywhere.

Want to feed a skill into Claude Code?

claude-code $(ud prompt pr-review)

Want to compose it with other commands in a pipeline?

ud prompt pr-review | pbcopy

Because it's just stdout, ud prompt works with any tool that reads from stdin — Claude Code, other local AI agents, shell pipelines, whatever fits your workflow. UnDercontrol doesn't try to own the AI layer; it just manages the prompts so you don't have to.

Skill detail view with markdown content and CLI usage commands

Built-in System Skills

UnDercontrol ships with built-in system skills that are seeded on first startup. These are read-only — you can't accidentally overwrite them — and they serve as both useful defaults and examples of how skills are structured. The ud-cli system skill, for instance, provides a comprehensive reference for the CLI's command structure, making it immediately available to AI agents that need to interact with your tasks.

System skills are marked with a lock icon in the web UI and appear alongside your custom skills. You can reference them by slug just like any custom skill.

Managing Skills Over Time

Skills are first-class resources in UnDercontrol, which means full CRUD support through both the web UI and the CLI.

  • ud get skills — list all skills in your group
  • ud describe skill <id> — inspect a specific skill's full content
  • ud delete skill <id> — remove one you no longer need
  • ud apply skill -f skills/ — apply an entire directory of skill definitions at once

The web editor is useful for quick edits and browsing what's available. The CLI is better for automation, bulk updates, and treating your prompt library as code.

Why This Matters

The idea behind skills is simple: the prompts that work well are worth keeping. Storing them in a self-hosted, group-scoped system means they don't disappear when someone leaves the team, don't get lost in a chat history, and don't require everyone to reinvent the same workflow independently.

It also keeps your prompts private. Because UnDercontrol is self-hosted, your prompt library — which often encodes institutional knowledge, internal processes, and domain-specific context — stays on your own infrastructure.

Get Started

Skills are available in UnDercontrol today. If you're already running an instance, you'll find the Skills page in the sidebar. If you're setting up for the first time, the self-hosting guide walks through deployment in about ten minutes.

Read the documentation or deploy your own instance to get started.

Team Up Without Giving Up Control: Collaboration in UnDercontrol

· 4 min read
Creator of UnDercontrol

Most productivity apps treat collaboration as an afterthought — you get a basic share button, maybe a comments section, and that's it. UnDercontrol takes a different approach: groups, role-based permissions, and shared tasks are first-class features built on the same foundation as everything else in the app.

The best part? You're still self-hosted. You're not handing your data to a third-party service to enable multi-user workflows.

How Groups Work

A group in UnDercontrol is a shared workspace. Think of it as a container for people who need to see or work on the same things together. Common setups include a family tracking a shared budget, a small team coordinating project tasks, or two people splitting household expenses.

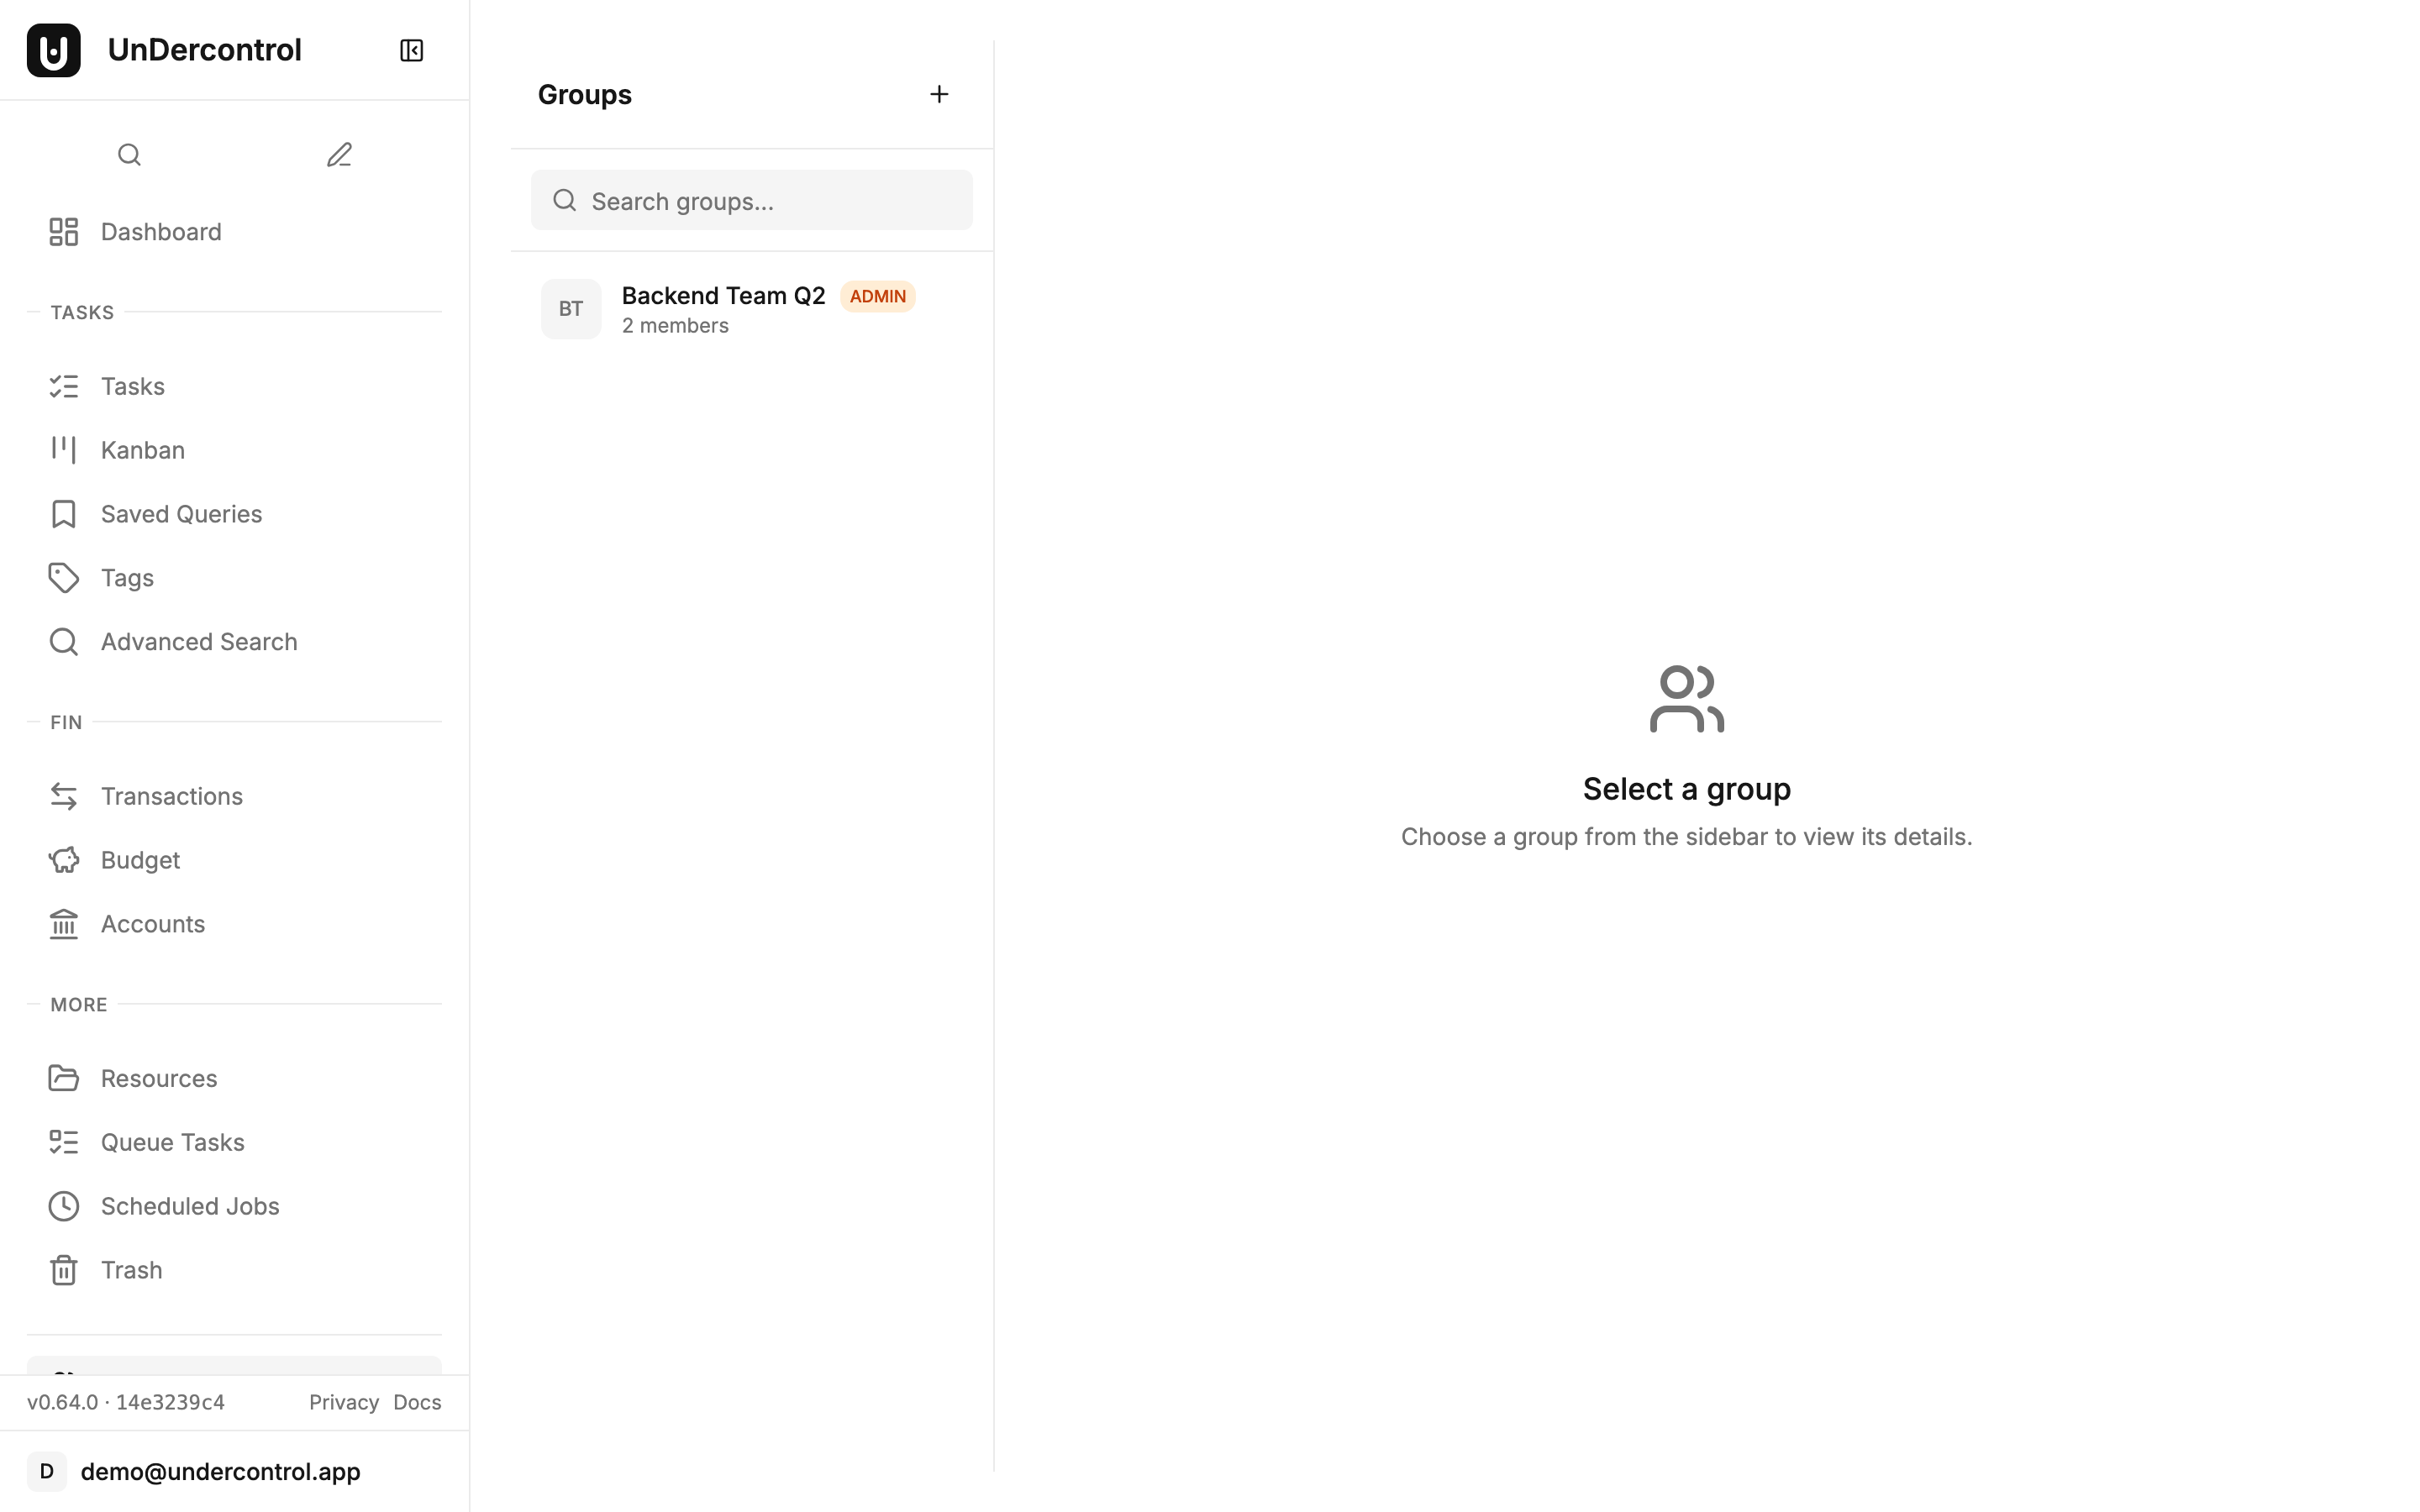
Creating a group takes about ten seconds: give it a name, add a description, and you're the owner. From there, you generate invite links to bring people in.

Invite links are flexible. You can set an expiration date so a link becomes invalid after a day or a week — useful when you're adding a temporary collaborator. You can also revoke any link at any time. It's a small detail, but it matters when you care about who has access to your workspace.

Group management for team collaboration

Role-Based Permissions

Once people are in a group, roles determine what they can do. There are three group-level roles:

  • Owner — full control over the group, including members, settings, and all shared content
  • Admin — can manage members and invites, access all shared content
  • Member — can view and interact with shared resources based on the permission level set on each item

Beyond group roles, UnDercontrol also has system-level roles: Admin, User, and Visitor. If you're running a self-hosted instance for a small organization, you can create custom roles with specific permission sets covering tasks, expenses, budgets, files, and more. This is the kind of access control you'd expect from enterprise tools, available in a self-hosted app you run yourself.

Sharing Tasks with the Right Level of Access

When you share a task with a group, you choose the permission level: read-only or read-write.

Read-only is useful when you want someone to stay informed without being able to modify anything — a manager reviewing a task list, for example, or a partner who needs to see what's on the agenda without accidentally editing it.

Read-write sharing enables real collaboration. Group members can update the task, check off items, and work alongside you. Shared tasks show up in each member's task list, so nothing gets buried.

Files attached to a shared task are automatically accessible to group members. There's no separate file-sharing step — if you've attached a PDF or an image to a task, everyone with access to that task can see it.

Kanban Boards and Shared Workflows

Shared kanban boards integrate directly with the group system. When you create a shared board, it automatically creates a group behind the scenes. The board creator becomes the group admin, and collaborators join as members. This means your team's workflow is always tied to a proper access model — not just an open link that anyone can stumble into.

Shared kanban board for team collaboration

Practical Tips

A few things worth knowing before you set up your first group:

Currently, each user can belong to one group at a time, so think about how you structure your workspace. If you're coordinating a work project and a household budget, the people involved will need to choose which group they're part of — or you handle both under a single group with clear task naming conventions.

Use descriptive group names from the start. "Family Budget 2026" or "Backend Team Q2" is far more useful three months later than "My Group."

Set expiration dates on invite links whenever you're adding someone for a limited purpose. It takes two extra seconds and removes the need to remember to revoke the link later.

Review your member list occasionally. People change roles, projects end, living situations shift. Keeping the member list current is basic hygiene for any shared workspace.

Get Started

If you already have a self-hosted instance running, head to the Groups page and create your first group. If you haven't set up UnDercontrol yet, the self-deployment guide walks through the full setup — you can be running in under an hour with Docker.

The collaboration documentation covers every feature in detail, including the full permission system and how groups interact with budgets and resources.

Real-Time Multi-Client Sync with Server-Sent Events

· 5 min read
Creator of UnDercontrol

If you have UnDercontrol open in a browser tab, on your desktop app, and on your phone at the same time, you probably expect them to stay in sync. Adding a task in one place should show up in the others without a page refresh. Logging an expense should reflect in your budget immediately, everywhere.

That kind of real-time sync sounds simple but gets complicated fast when you factor in reconnects, offline states, and the cost of keeping connections alive. Here is how UnDercontrol handles it.

Why Server-Sent Events

WebSockets are the obvious choice for real-time features, but they come with overhead — bidirectional connections, custom protocol handling, and more complexity on both ends. For UnDercontrol, the update flow is almost entirely one-directional: the server pushes changes down to clients. That maps perfectly onto Server-Sent Events (SSE), which is a standard HTTP mechanism built into every modern browser.

SSE gives us persistent connections over plain HTTP, automatic reconnection built into the browser spec, and no additional infrastructure beyond the Go backend that already runs your instance. It keeps the self-hosted model clean.

How It Works

When you open UnDercontrol, the frontend establishes an SSE connection to the backend. Your session is registered in a per-user connection hub — a structure that tracks every active connection for your account across tabs, devices, and the Electron desktop app. When something changes (a task is updated, an expense is logged, a file is renamed), the backend emits an event onto an internal async event bus. That event fans out to every connection registered under your user ID.

This means if you log an expense on your phone, your browser tab sees it within milliseconds. No polling, no manual refresh.

The connection lifecycle is managed deliberately. Connections are kept alive for up to 30 minutes, after which they cycle and reconnect. This prevents resource leaks on long-running instances and plays nicely with load balancers and reverse proxies that have their own timeout rules. If a connection drops for any reason — network hiccup, sleep/wake cycle, proxy timeout — the client reconnects automatically using exponential backoff. It starts with a short delay and increases gradually, so a briefly offline device does not hammer your server the moment it comes back online.

Smart Cache Updates on the Client

Getting an event is one thing. Knowing what to do with it is another. UnDercontrol does not blindly refetch the entire dataset when an SSE event arrives. Instead, the frontend applies differential cache updates: it looks at what changed, finds the relevant entry in the local Zustand store, and patches only that record.

For example, if a task's status changes from "in progress" to "done," the event carries just that task's updated state. The client merges it into the existing cache. The list re-renders with the new status. Everything else stays untouched.

Kanban board with live status updates pushed via SSE

This keeps the UI fast and prevents the jarring full-reload effect you see in apps that refetch aggressively.

Optimistic UI and Server Reconciliation

SSE works alongside UnDercontrol's optimistic update model. When you make a change locally, the UI updates immediately — no spinner, no waiting. The write goes to the server in the background. If it succeeds, the server emits an SSE event that propagates to your other clients. If it fails, the local state reverts and you see an error.

The result is that your primary device feels instant, while your secondary devices stay consistent. The server is the source of truth, and SSE is the mechanism that keeps everyone aligned with it.

Practical Benefits You Will Notice

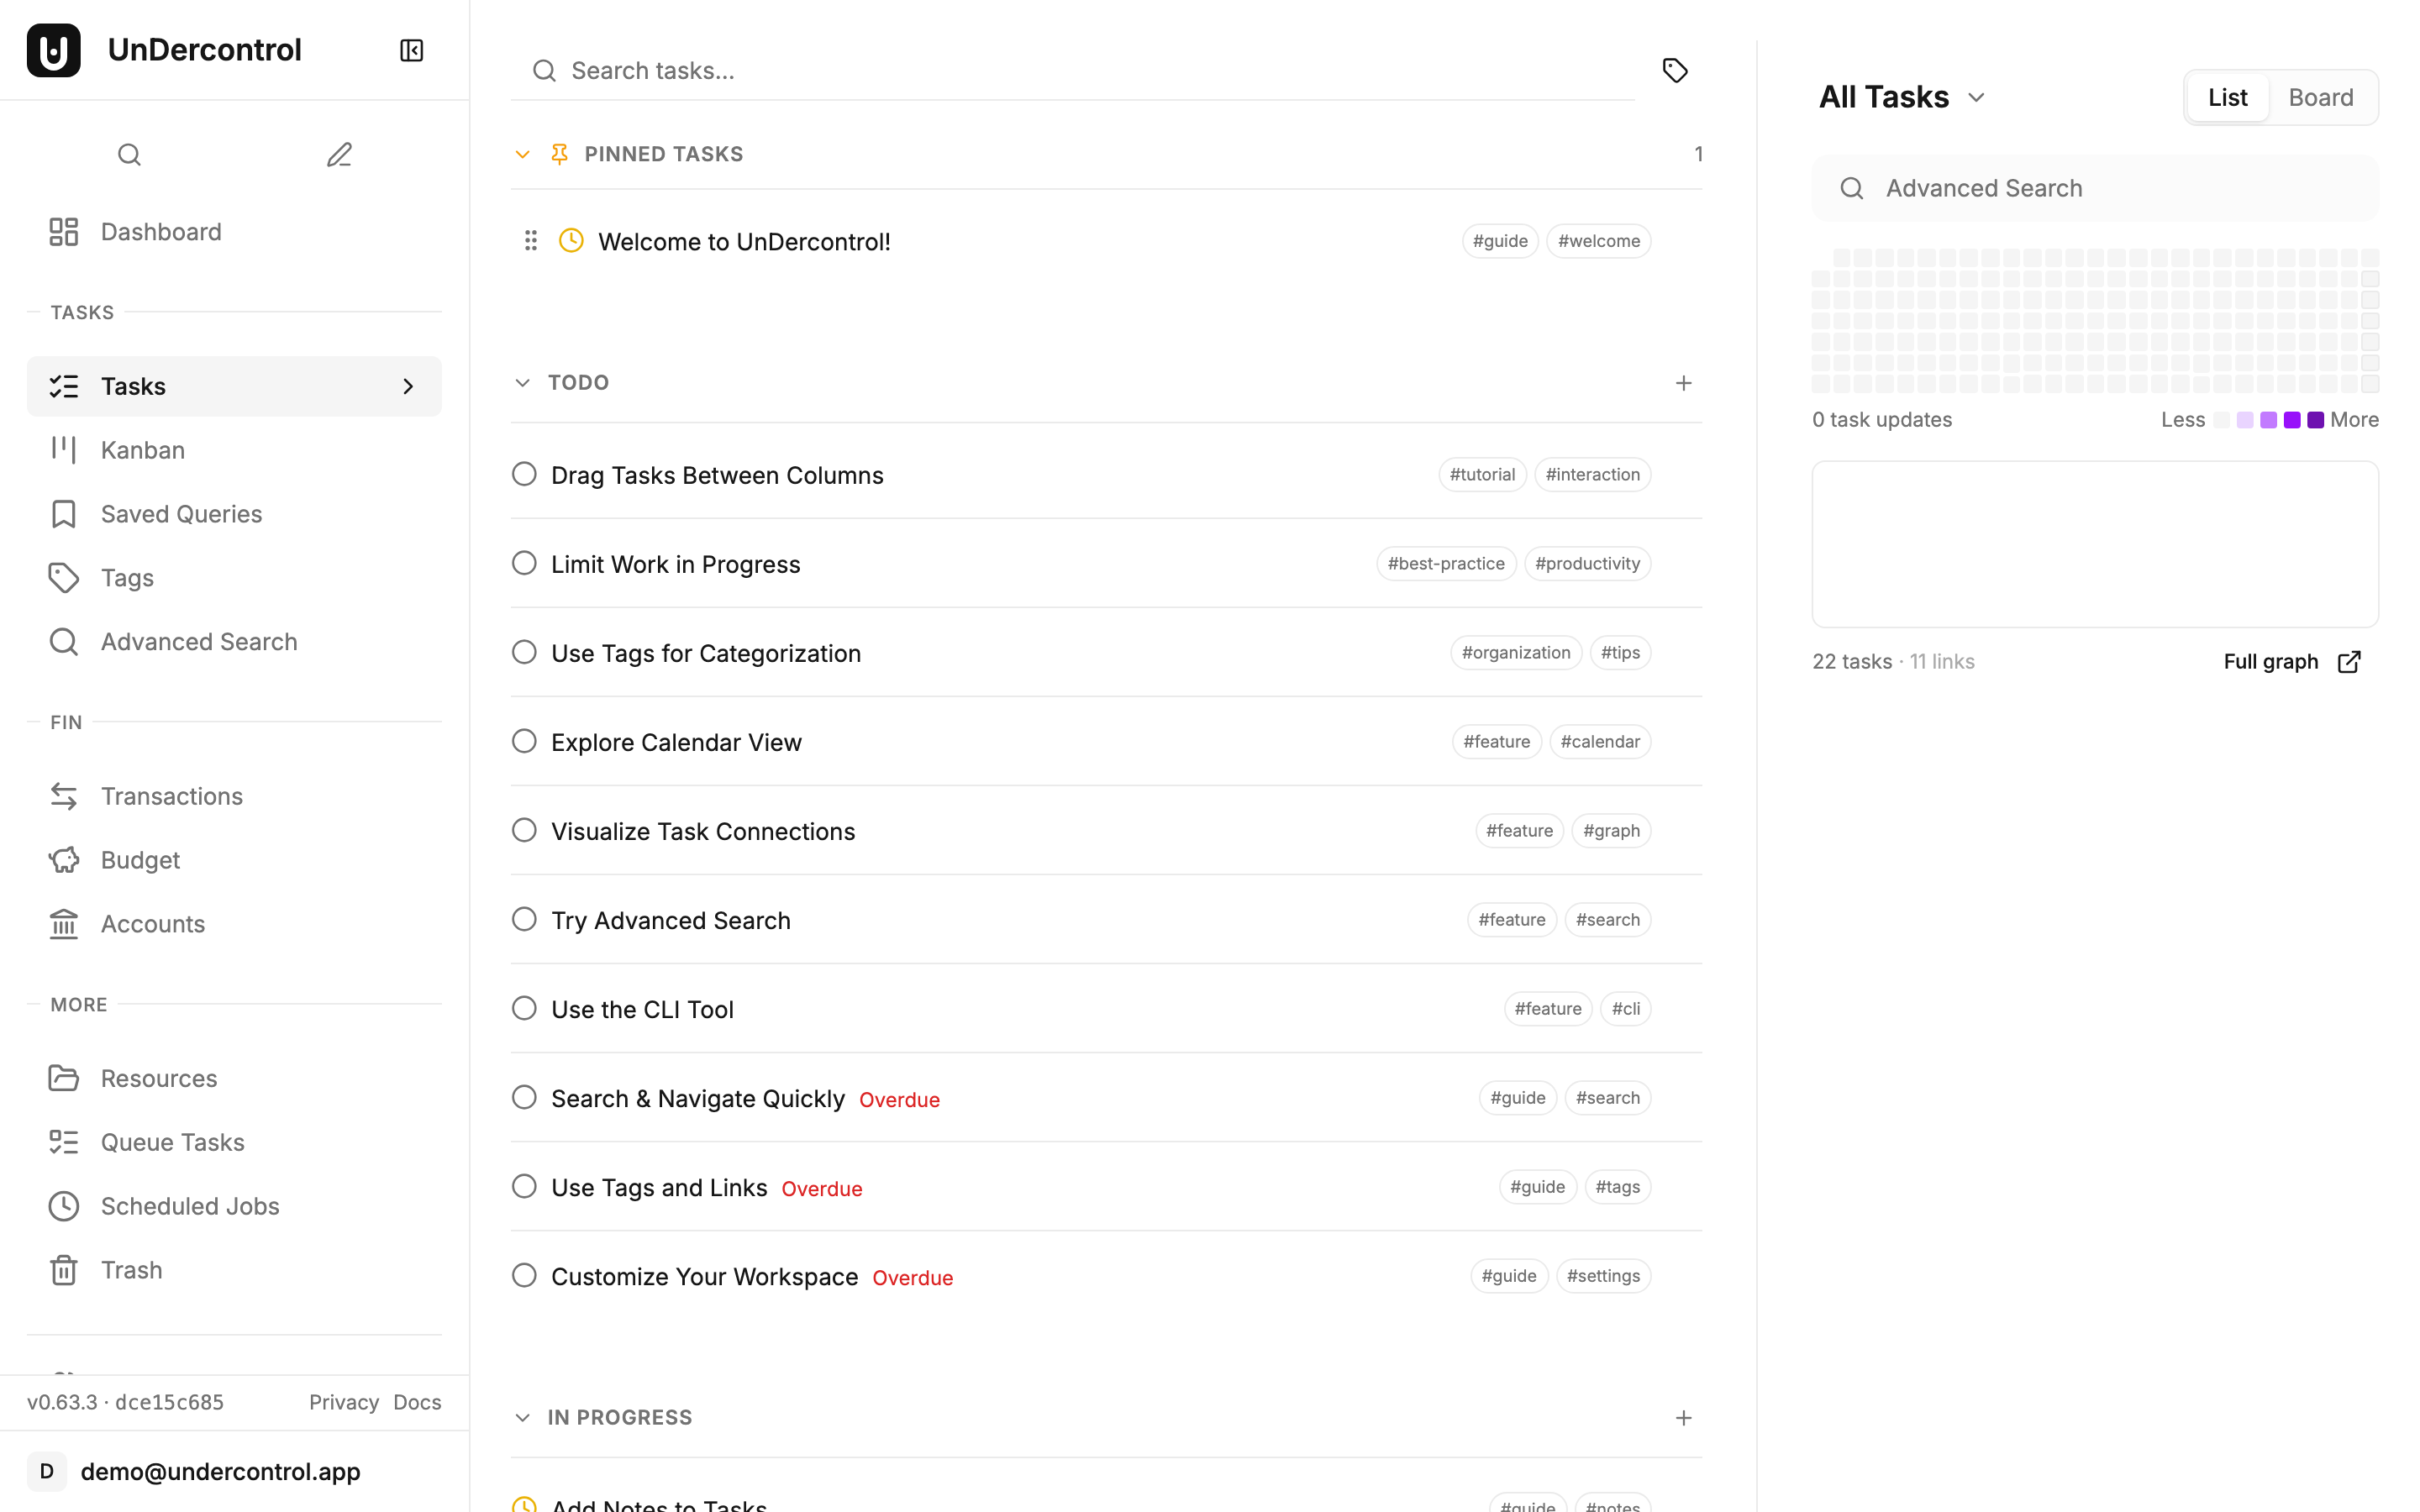
Open the same UnDercontrol instance in two browser tabs. Make a change in one. Watch it appear in the other without touching anything.

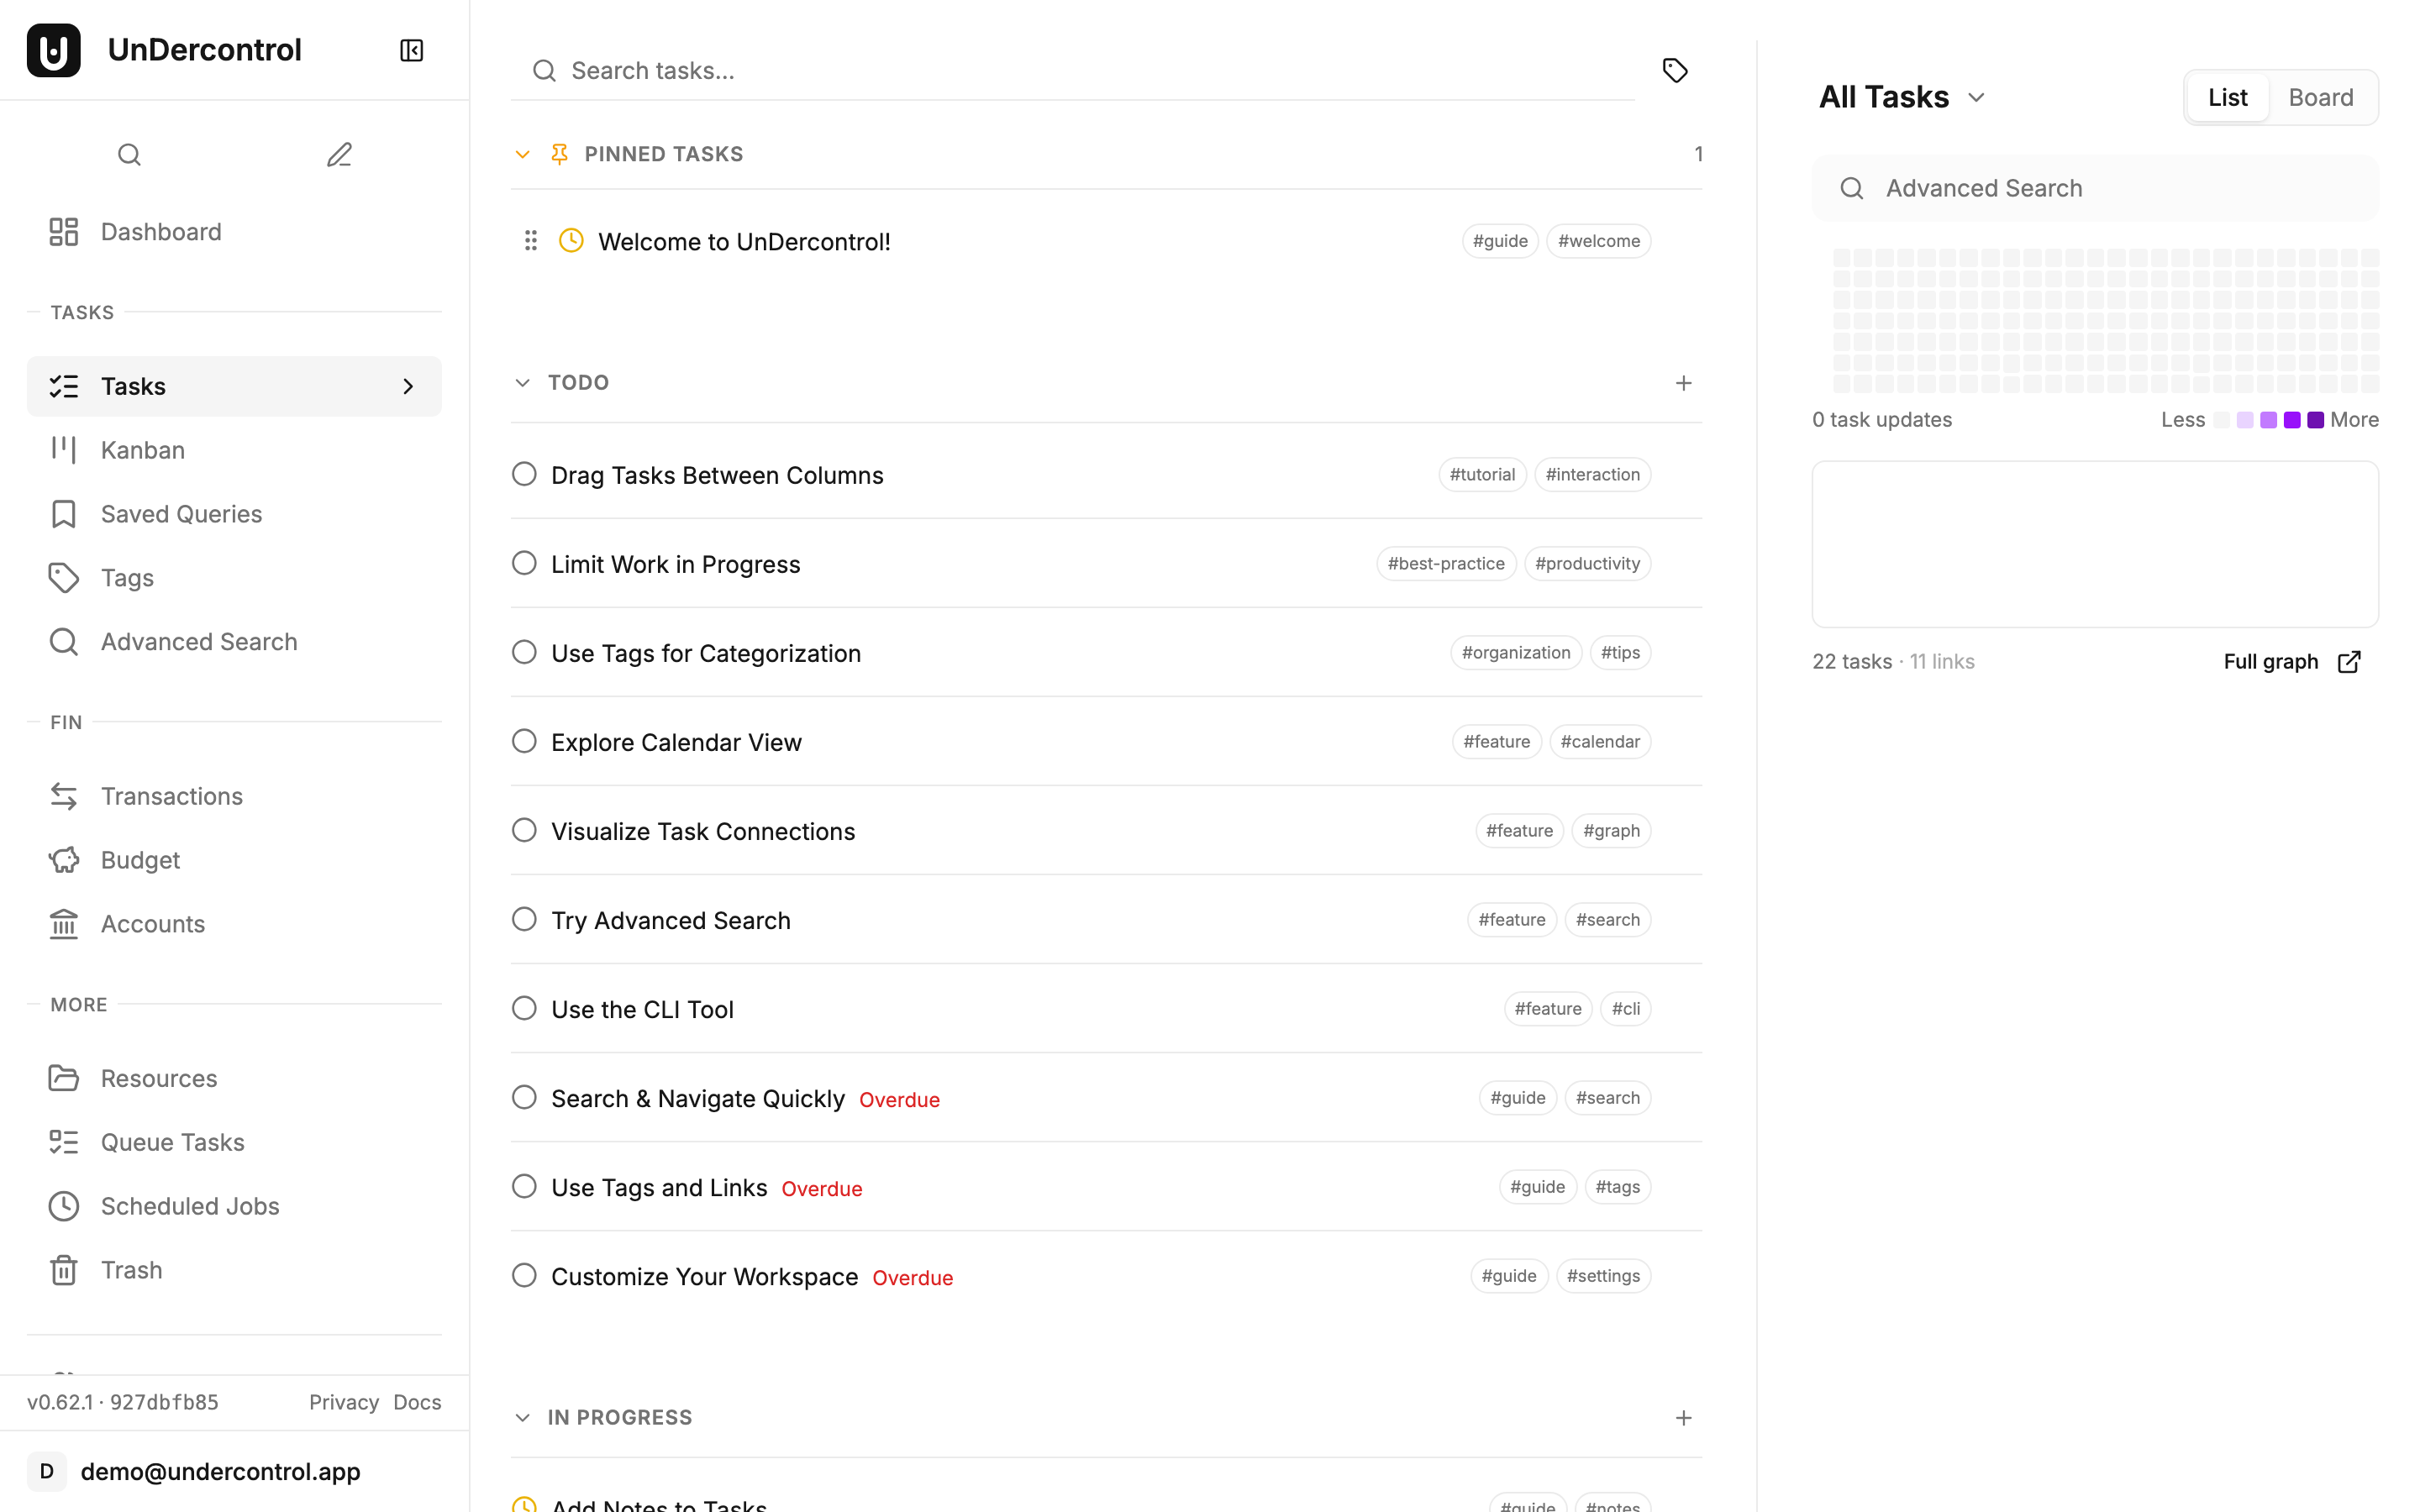
Task list view — changes sync in real-time across all connected clients

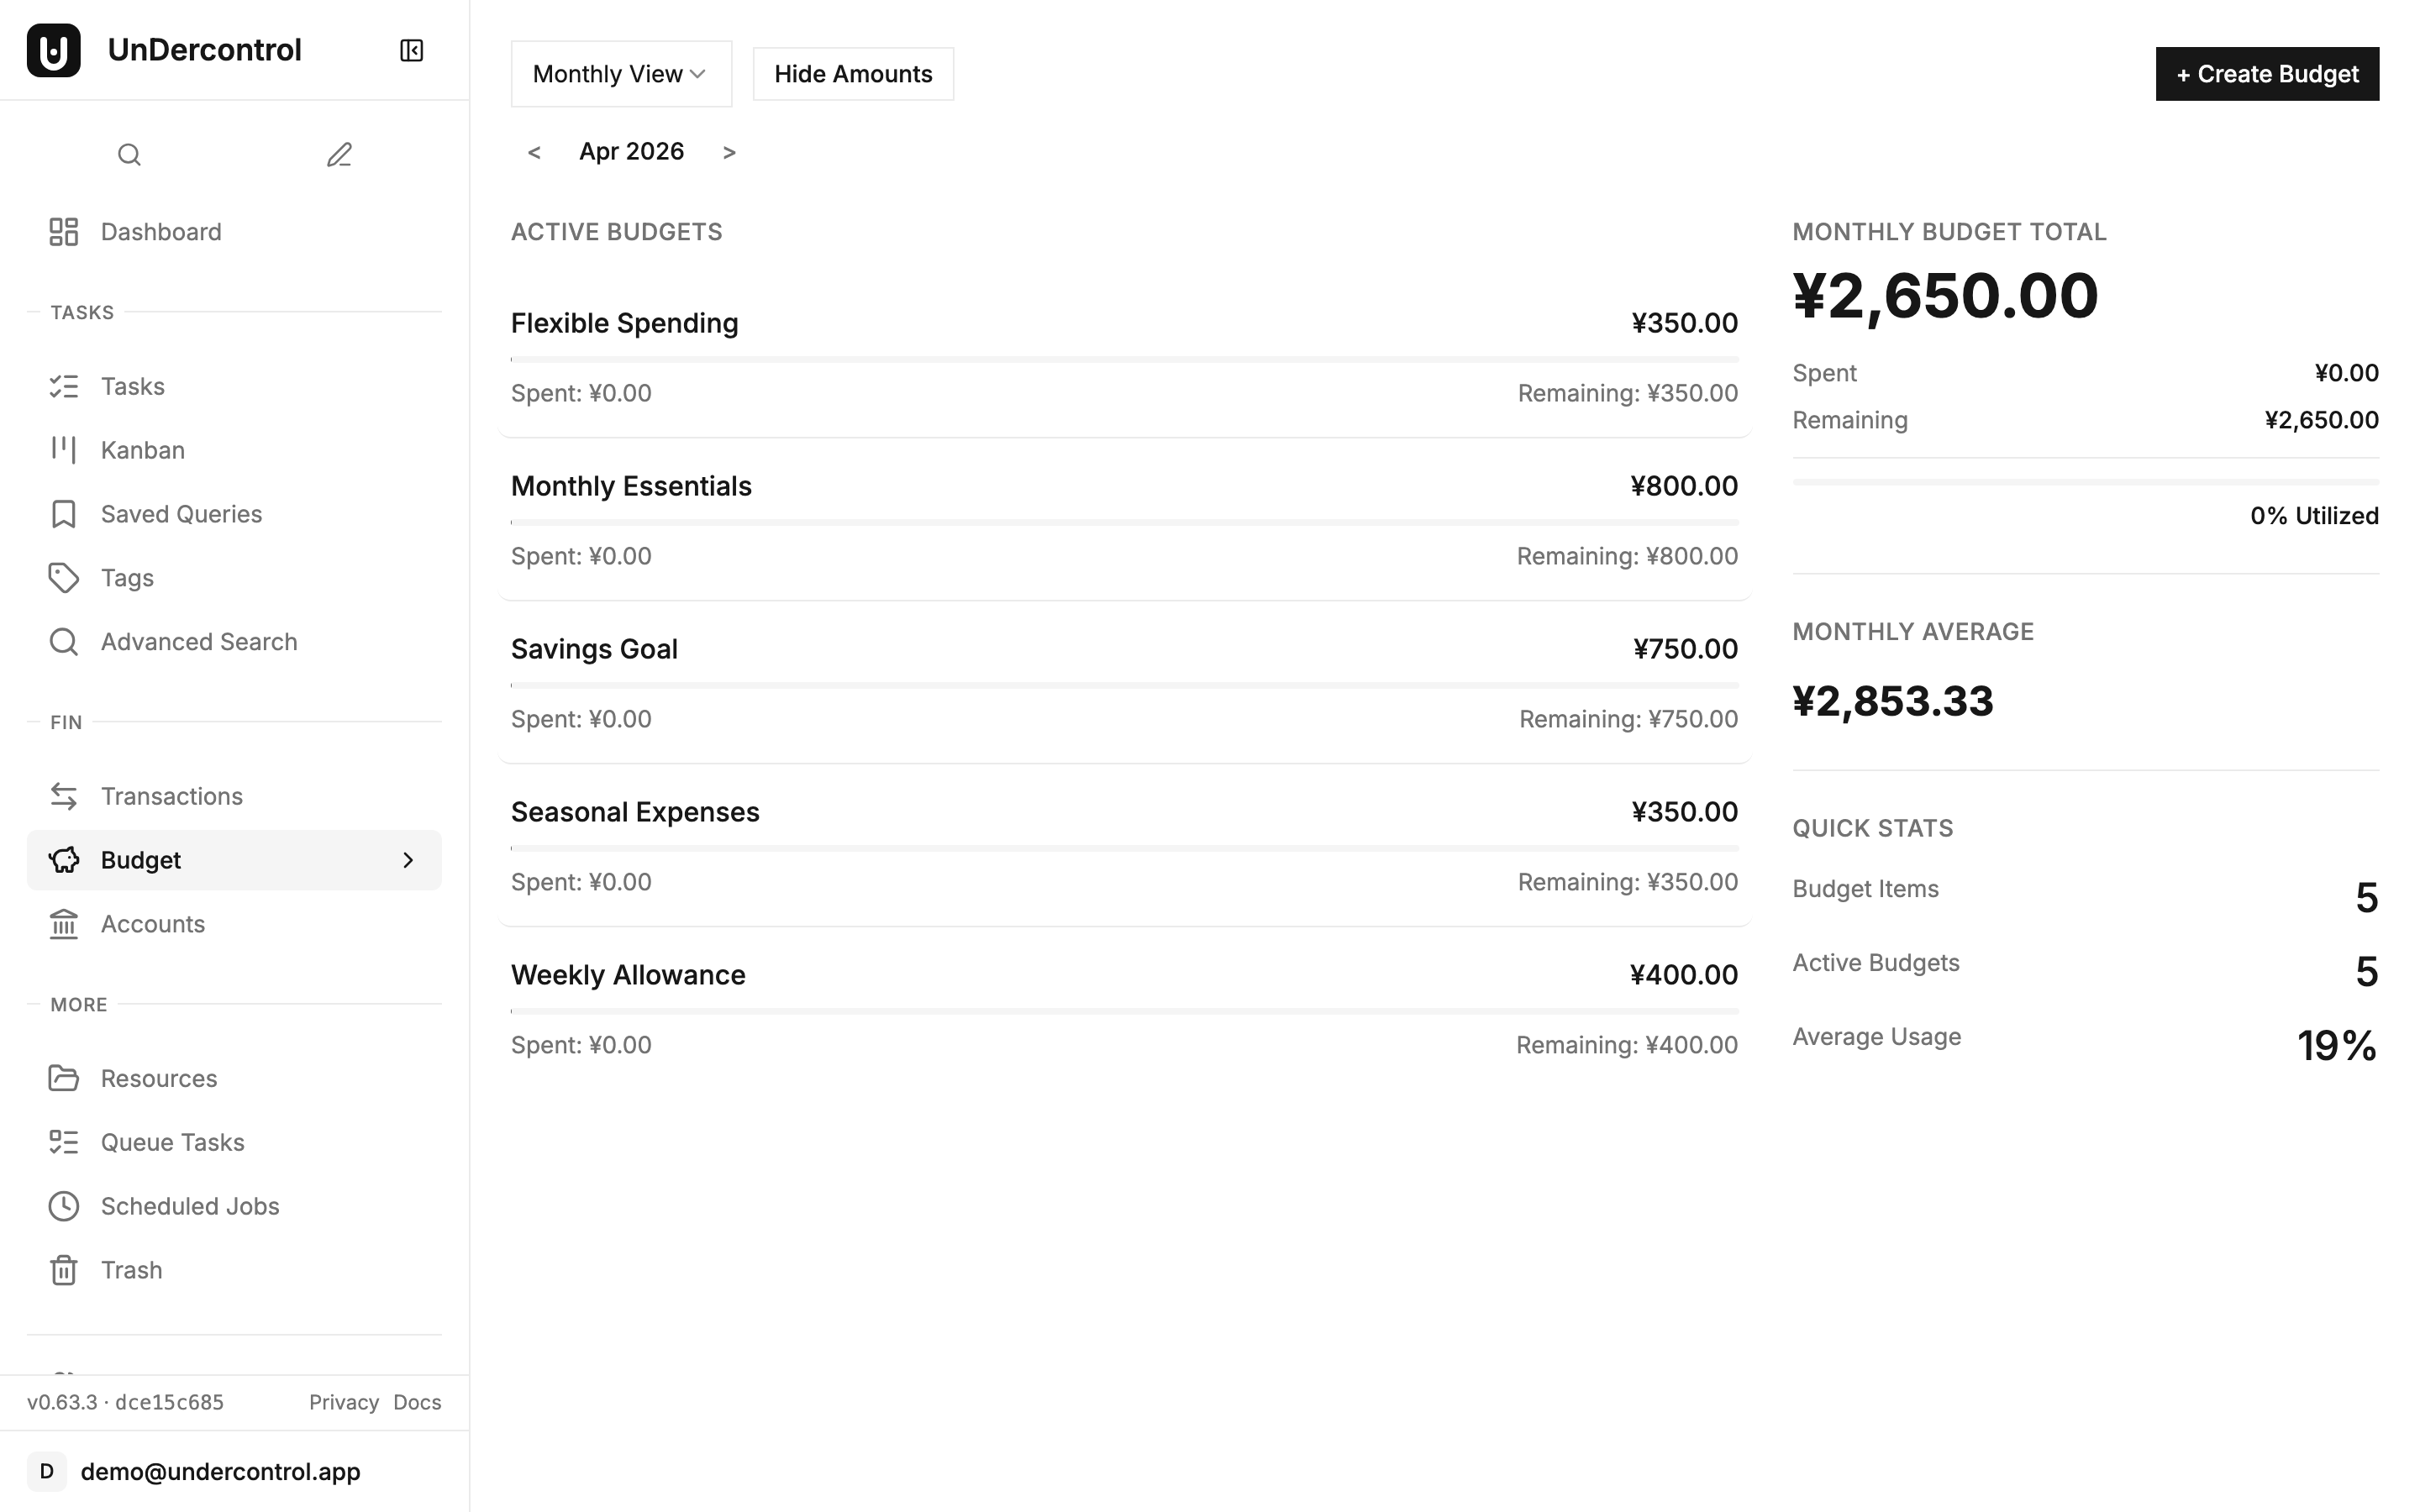
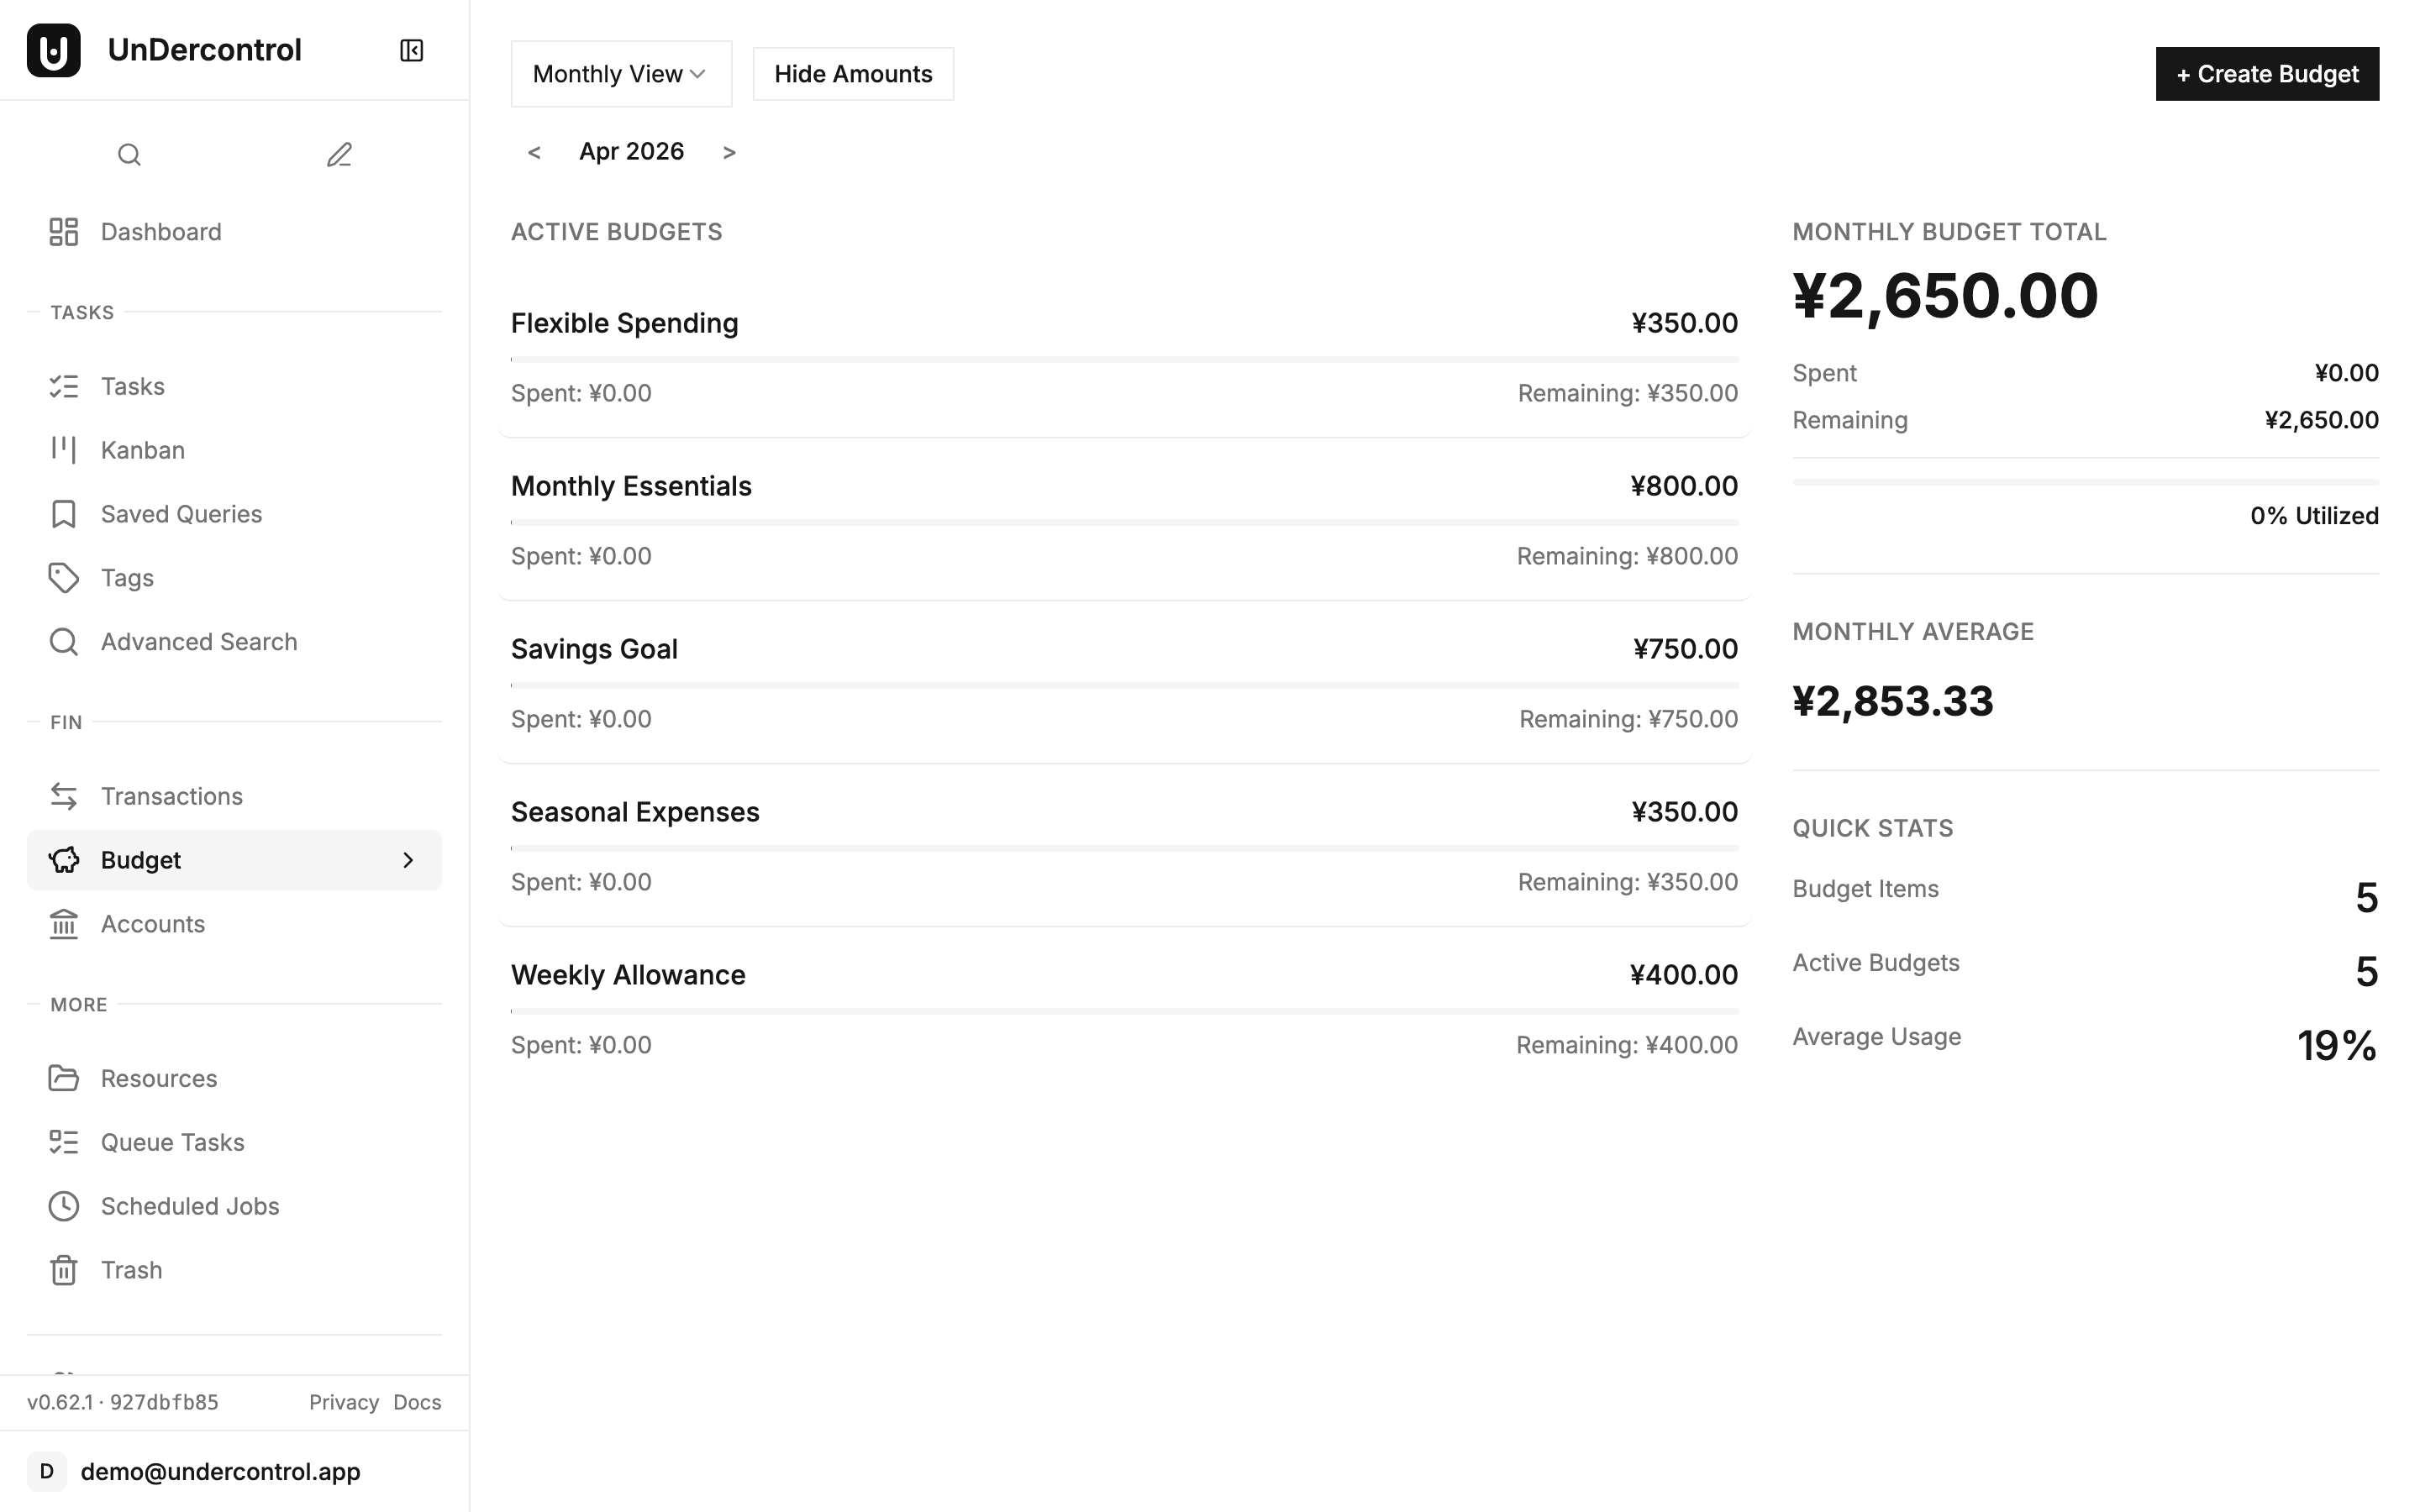
This is particularly useful when you have a budget overview open on one screen and you are logging transactions on another.

Budget overview — expense changes propagate instantly to all open views

The Electron desktop app participates in the same sync. Changes made through the CLI or the Chrome extension propagate back through SSE to whatever else you have open. The whole multi-platform story depends on this layer working reliably.

Try It Yourself

All of this runs on your own hardware. There is no cloud dependency, no third-party sync service, and no data leaving your control. The SSE endpoint is part of the standard UnDercontrol backend.

If you are not running UnDercontrol yet, the self-deployment guide covers getting started with Docker in a few minutes. If you are already running an instance, the sync is already active — just open a second tab and see for yourself.

Check the documentation for deployment instructions and configuration options.

Terminal-First Task Management with the ud CLI

· 4 min read
Creator of UnDercontrol

If you spend most of your day in a terminal, switching to a browser tab just to log a task or check what's on your plate is friction you don't need. The ud CLI was built to eliminate that context switch. It brings the full power of UnDercontrol — task CRUD, notes, querying, kanban boards — into your shell, and it follows a command structure you already know.

kubectl-style Commands, Because It Works

The CLI uses the same verb-resource pattern that made kubectl feel intuitive to so many engineers. You get, describe, apply, and delete resources. No new mental model required.

# List all tasks
ud get task

# Show full details on a task (short ID prefix supported)
ud describe task 3de9f82b

# Create or update from a markdown file
ud apply -f task.md

# Delete a task
ud delete task abc123

The apply command deserves a highlight. Your task is a markdown file with YAML frontmatter. If the file has an id field, it updates the existing task. No id? It creates a new one. This makes bulk updates, scripted workflows, and version-controlled task definitions straightforward.

echo '---
title: Write release notes
status: in-progress
tags:
- release
deadline: 2026-04-10
---

Draft the changelog and update the docs site.' | ud apply -f -

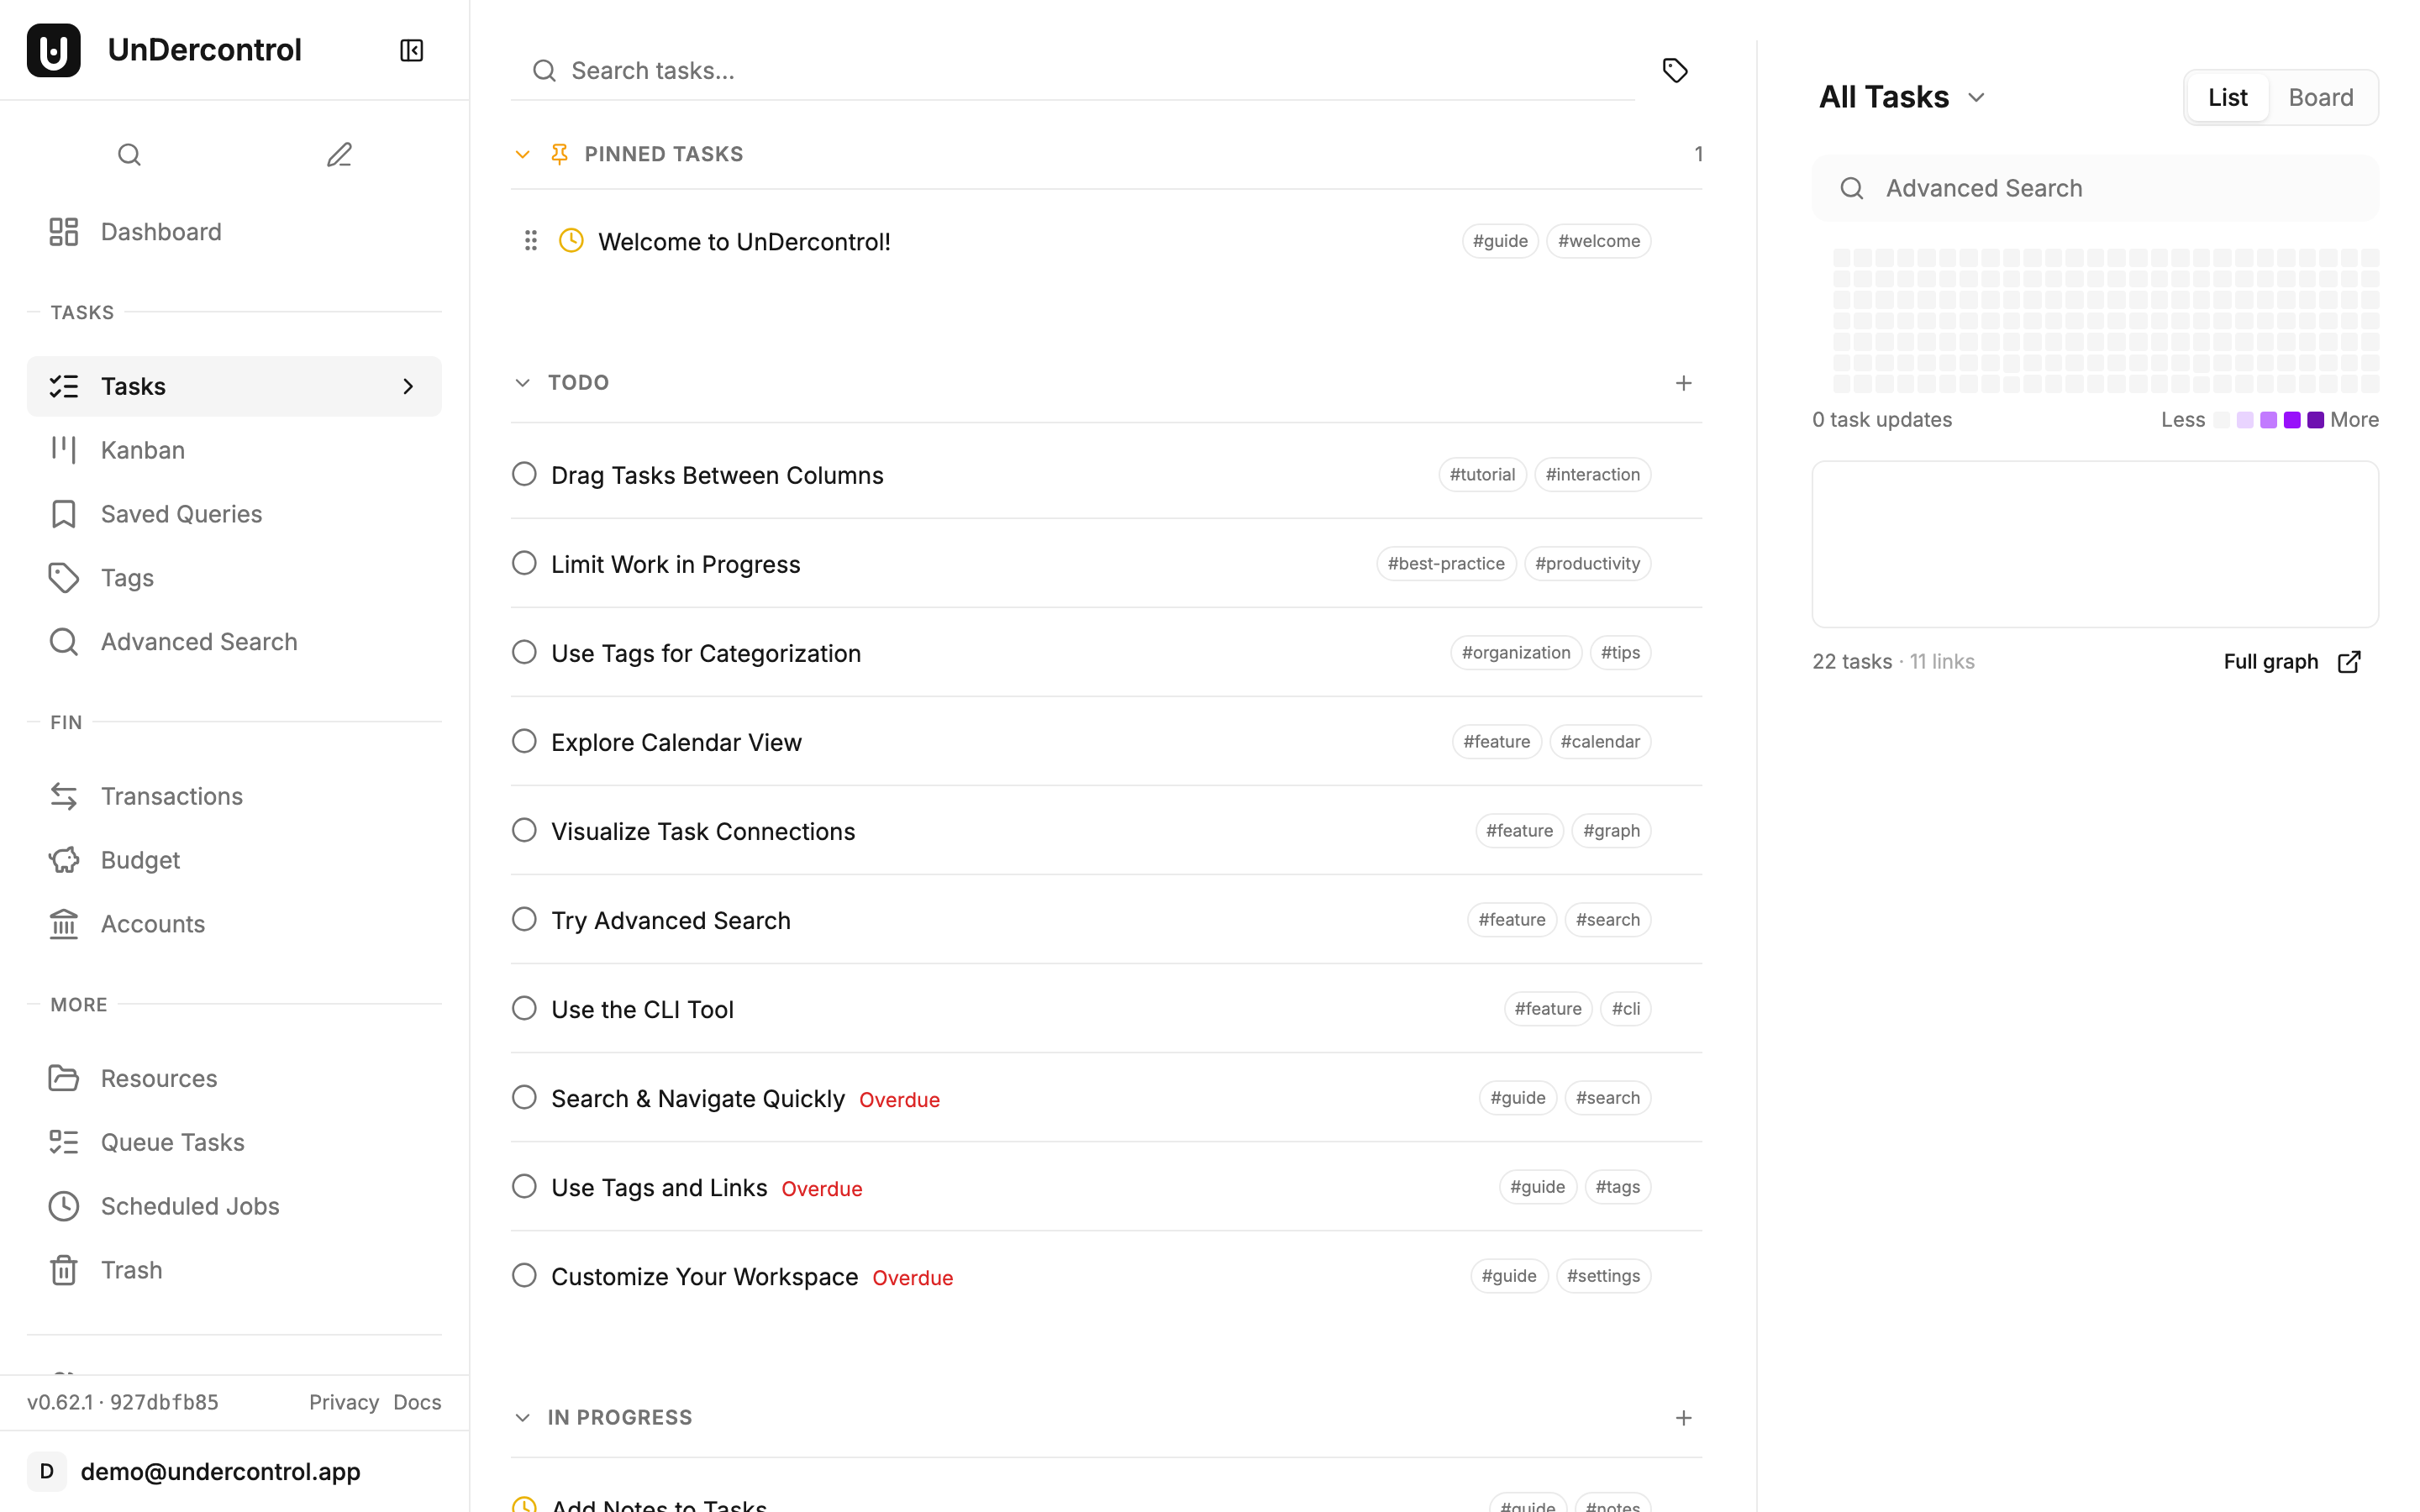
Task list view — what the ud CLI manages from your terminal

Query Syntax That Actually Filters

ud task query gives you a SQL-like filter language over your tasks. It is useful when you have enough tasks that "scroll through the list" stops being a real strategy.

# Tasks with a deadline this week
ud task query "deadline BETWEEN 'today' AND '+7d'"

# Active tasks tagged urgent
ud task query "(status = 'todo' OR status = 'in-progress') AND tags = 'urgent'"

# Title search
ud task query "title ILIKE '%api%'"

If you would rather not think about syntax at all, ud task nlquery accepts plain English and translates it via AI:

ud task nlquery "show me overdue tasks"
ud task nlquery "tasks tagged with work that are not done"

Both commands accept --sort, --order, and --limit flags for pagination and ordering, so they compose cleanly into scripts or shell aliases.

Notes as a Progress Log

Every task supports notes — short freeform entries that act as a running log. This is useful for tracking what you actually did, not just the end state.

ud task note add 3de9f82b "Finished the backend changes, opening PR now"
ud task note ls 3de9f82b

Notes also make the CLI a natural fit for AI agent workflows. An agent can create a task from a plan file, append progress notes at each step, and mark the task done — all without touching a browser. The human side of the team sees the full history in the UnDercontrol web UI or desktop app. It is a low-ceremony handoff that actually works in practice.

Interactive TUI for When You Want a Visual

Running ud with no arguments opens the terminal UI — a keyboard-driven kanban-style interface with vim bindings.

Built-in terminal with ud CLI commands

KeyAction
j / kMove through tasks
EnterOpen task detail
iCreate a new task
xToggle status
/Search
fFile picker (fuzzy search local files to create tasks from)

The file picker is a nice touch. Press f, fuzzy-search a markdown file in your current directory, and it becomes a task — first line is the title, the rest becomes the description. Useful when you keep notes in a project repo and want them tracked.

Multi-Context for Multiple Servers

If you self-host UnDercontrol across multiple environments — personal, work, a staging instance — the context system handles it the same way kubectl does.

ud config set-context work --api-url https://ud.company.com
ud login --context work

# Use a different context for a single command
UD_CONTEXT=personal ud get task

Config lives in ~/.config/ud/config.yaml. You can also drive the CLI entirely through environment variables (UD_API_URL, UD_API_KEY, UD_TOKEN), which makes it usable in CI pipelines without touching config files.

Getting Started

Install via npm, Homebrew, or a single curl command:

npm install -g @oatnil/ud
# or
brew install oatnil-top/ud/ud
# or
curl -fsSL https://get.oatnil.com/ud | bash

Then point it at your UnDercontrol instance:

ud login

The full command reference — including file attachment, multi-context auth, and advanced query syntax — is in the CLI Reference docs. If you are not running UnDercontrol yet, the self-hosting guide covers getting a server up with Docker in a few minutes.

Managing Multiple Accounts with CLI Contexts

· 4 min read
Creator of UnDercontrol

If you run more than one UnDercontrol instance — say, a personal server and a work server — you've probably felt the friction of juggling different API endpoints and credentials. The ud CLI ships with a context system modeled after kubectl, so switching between accounts is a single command.

Power User Queries and Saved Filters in UnDercontrol

· 4 min read
Creator of UnDercontrol

If you have more than a handful of tasks in UnDercontrol, you have probably hit the point where "scroll and scan" stops working. You know what you are looking for — overdue items, everything tagged work that is still in progress, tasks with no deadline yet — but getting to them quickly takes more than a status filter.

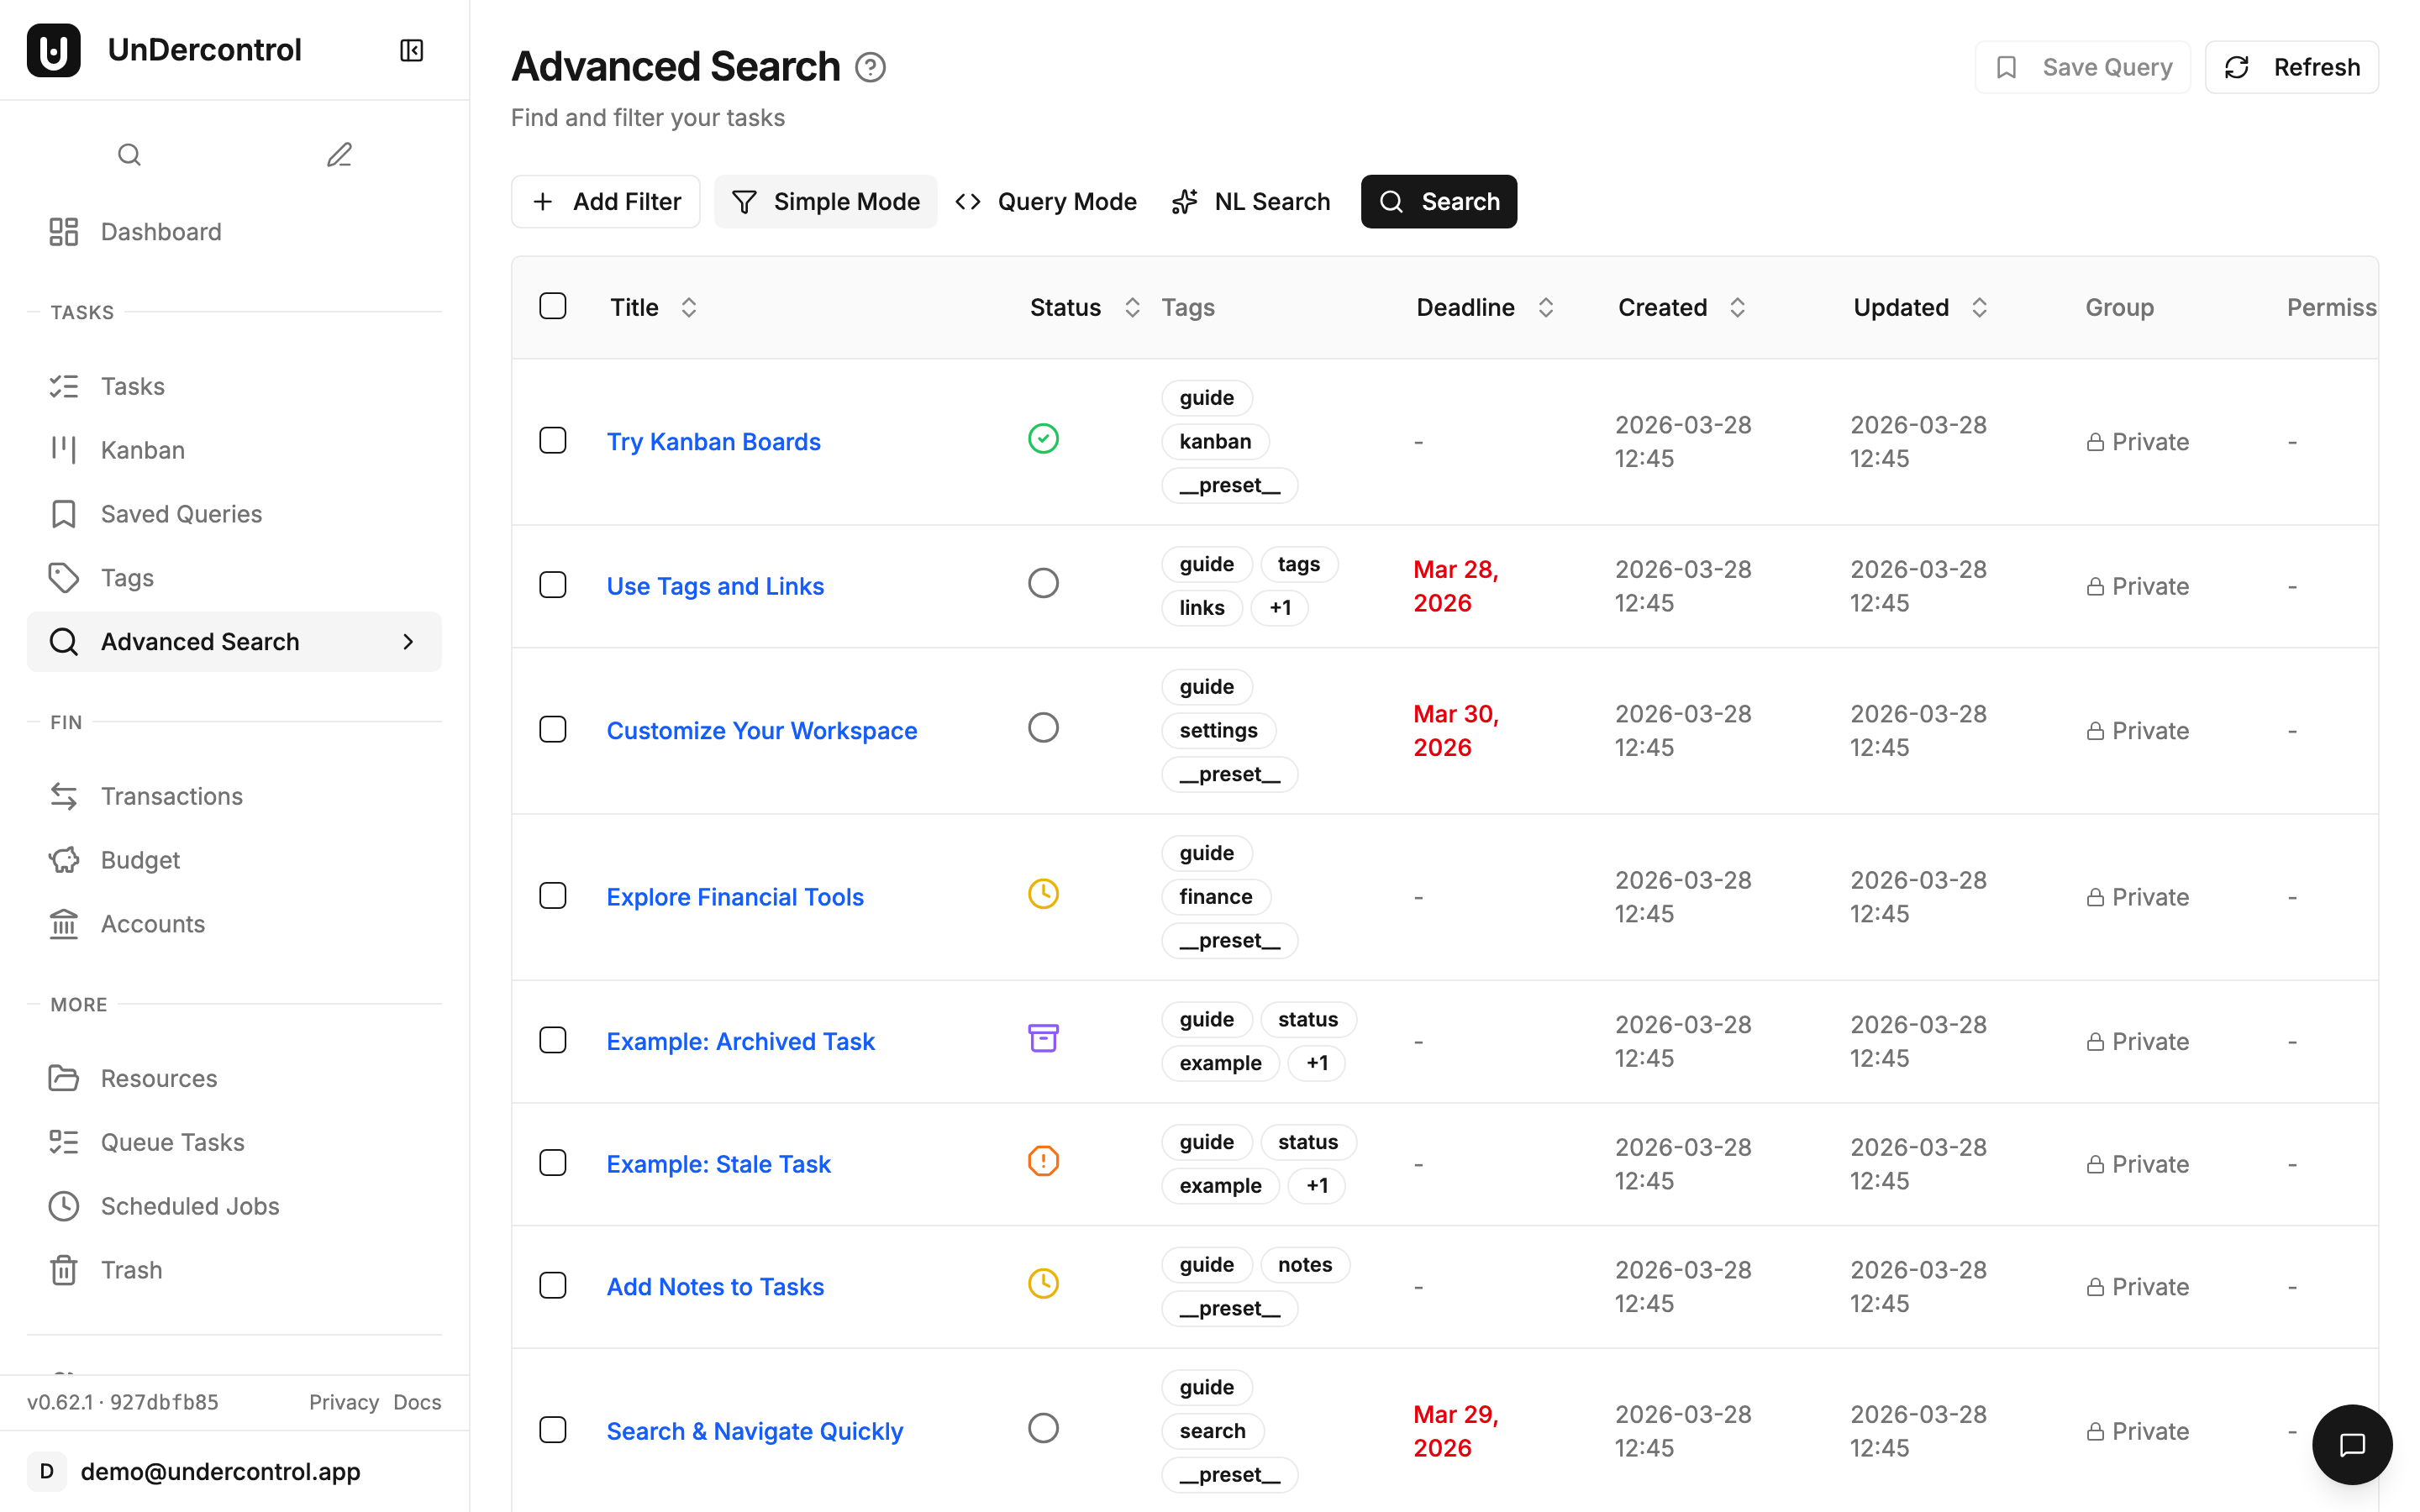
This post covers the query system built into UnDercontrol: a SQL-like syntax that works across the web UI, the CLI, custom views, kanban boards, and saved queries. Once it clicks, you will use it constantly.

The Query Syntax

The syntax is deliberately close to SQL WHERE clauses. If you have ever written a database query, it will feel familiar immediately. If you have not, the basics take about five minutes to pick up.

A simple query looks like this:

status = 'todo' AND deadline <= 'today'

That finds every task that is still todo and due today or earlier — in other words, overdue todo items.

You can build on that with tags, text search, date ranges, and custom fields:

(deadline <= 'today' OR tags = 'urgent') AND status != 'done' AND status != 'archived'

This is a reliable "needs attention now" query. Pin it as a saved query (more on that below) and you have a one-click urgent task list.

Task search with query syntax filtering

Datetime Expressions

One of the more practical parts of the syntax is the relative date support. Instead of hardcoding dates, you write things like '-7d', '+1w', or just 'today'.

-- Tasks created in the last week
created_at >= '-7d'

-- Due within the next month
deadline BETWEEN 'today' AND '+1m'

-- Updated today
updated_at >= 'today'

The supported units are days (d), weeks (w), months (m), and years (y), with + for future and - for past. Standard ISO 8601 dates like 2025-06-01 also work when you need a fixed date.

Text Search and Custom Fields

Text search uses LIKE (case-sensitive) and ILIKE (case-insensitive) with % as a wildcard:

title ILIKE '%api%'

For custom fields, prefix with cf.:

cf.priority > 3 AND cf.department = 'engineering'

Custom fields support the full range of comparison operators depending on their type — numbers, text, selects, checkboxes, and user references all work.

Natural Language Queries

Writing queries manually is fast once you know the syntax. But if you would rather just describe what you want, the AI integration handles the translation.

In the web UI, open the AI Chat panel on the task page and type something like "show me overdue tasks that have the work tag". The AI generates the structured query and runs it.

From the CLI, use ud task nlquery:

ud task nlquery "tasks I need to finish this week"
ud task nlquery "high priority engineering items with no deadline"

The nl alias also works if you want to save a few keystrokes. This requires an AI provider to be configured, but once it is set up it handles surprisingly natural phrasing.

Saved Queries

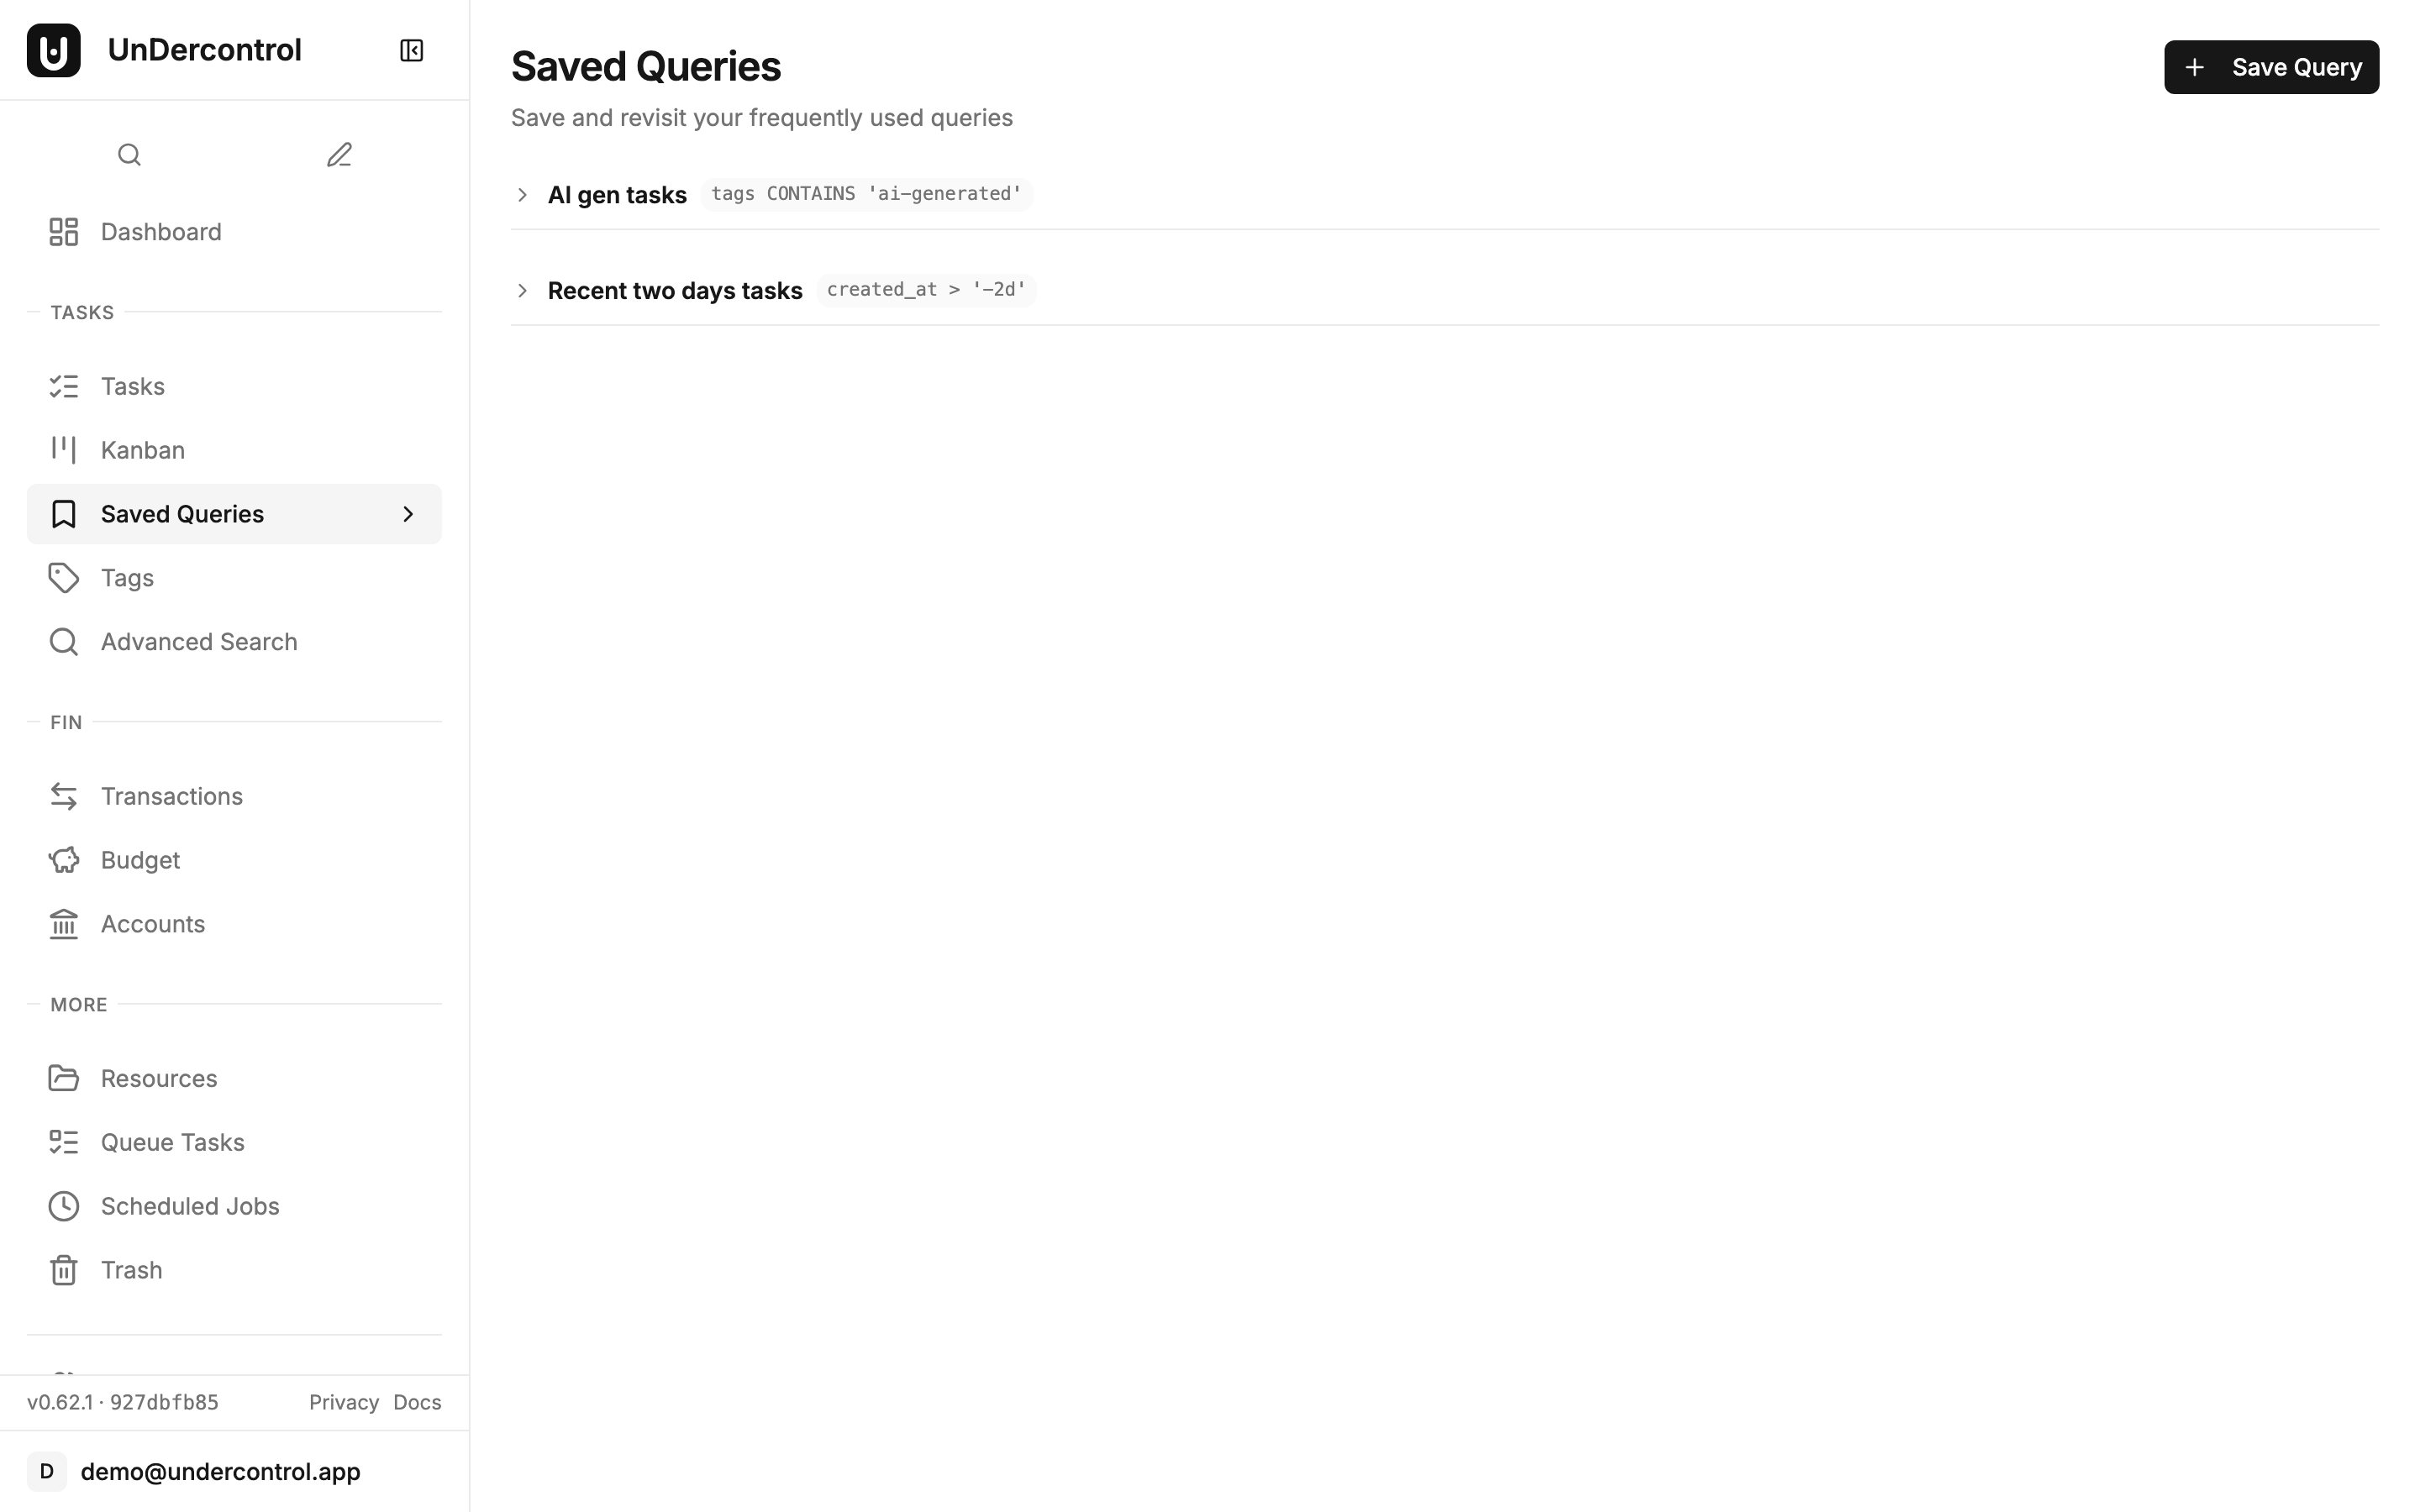
This is where the query system becomes genuinely useful day-to-day. Saved Queries let you name and store any query, then run it with a single click from the sidebar.

A few worth setting up immediately:

NameQuery
Overduedeadline < 'today' AND status != 'done' AND status != 'archived'
Due This Weekdeadline BETWEEN 'today' AND '+7d' AND status != 'done'
Unplanneddeadline IS NULL AND status = 'todo'
Recently Activeupdated_at >= '-7d' AND status IN ('todo', 'in-progress')

Saved queries for quick access to filtered views

You can pin queries to keep your most-used ones at the top, reorder them by drag and drop, and edit them at any time. When you click a saved query, results expand inline — no navigation required.

Using Queries in the CLI

The CLI supports the same query syntax through ud task query:

ud task query "status = 'todo'" --sort deadline --order asc
ud task query "(status = 'todo' OR status = 'in-progress') AND tags = 'work'"

Flags for pagination (--page, --limit) and sorting (--sort, --order) are available. This makes it straightforward to pipe results into other tools or use queries inside shell scripts.

Getting Started

The full query syntax reference is in the Query Syntax documentation, including every operator, all datetime expression formats, and a full set of practical examples to copy and adapt.

If you are not running UnDercontrol yet, the self-hosting guide covers deployment with Docker. Your data stays on your own infrastructure — that is the whole point.

Keep Your Files Where Your Work Lives: Resource Management in UnDercontrol

· 5 min read
Creator of UnDercontrol

Most productivity apps treat file storage as an afterthought — a folder somewhere, disconnected from the work it supports. UnDercontrol takes a different approach: files live next to the tasks, expenses, and budgets they belong to, so a receipt stays with the expense it documents and a design diagram stays with the task it informs.

Here is how the resource management system works in practice.

Upload the Way You Actually Work

Getting files into UnDercontrol should not require a trip through a file picker every time. There are three main ways to upload:

Drag and drop — open the Resources page or an attachment panel on a task or expense, then drag a file in. Works for single files and batches.

Paste from clipboard — press Ctrl+V and the file in your clipboard uploads immediately. This is particularly useful for screenshots. Take a screenshot of a receipt or a bug in a UI, switch to UnDercontrol, paste. No saving to disk first.

CLI upload — if you live in the terminal, the ud CLI handles uploads directly:

ud upload resource ./receipt.png --entity-type expense --entity-id exp-456

This is useful for scripted workflows, like automatically attaching exported reports to a monthly budget review task.

Attach Once, Reference Everywhere

A single resource can be linked to multiple items. If you have a contract PDF that is relevant to both a budget and a task, you attach it to both — no duplicates, no hunting through folders. When the task gets marked done, you can unlink the file from it while keeping it attached to the budget.

The inspector panel shows you exactly where a file is attached, so you never lose track of which items reference it.

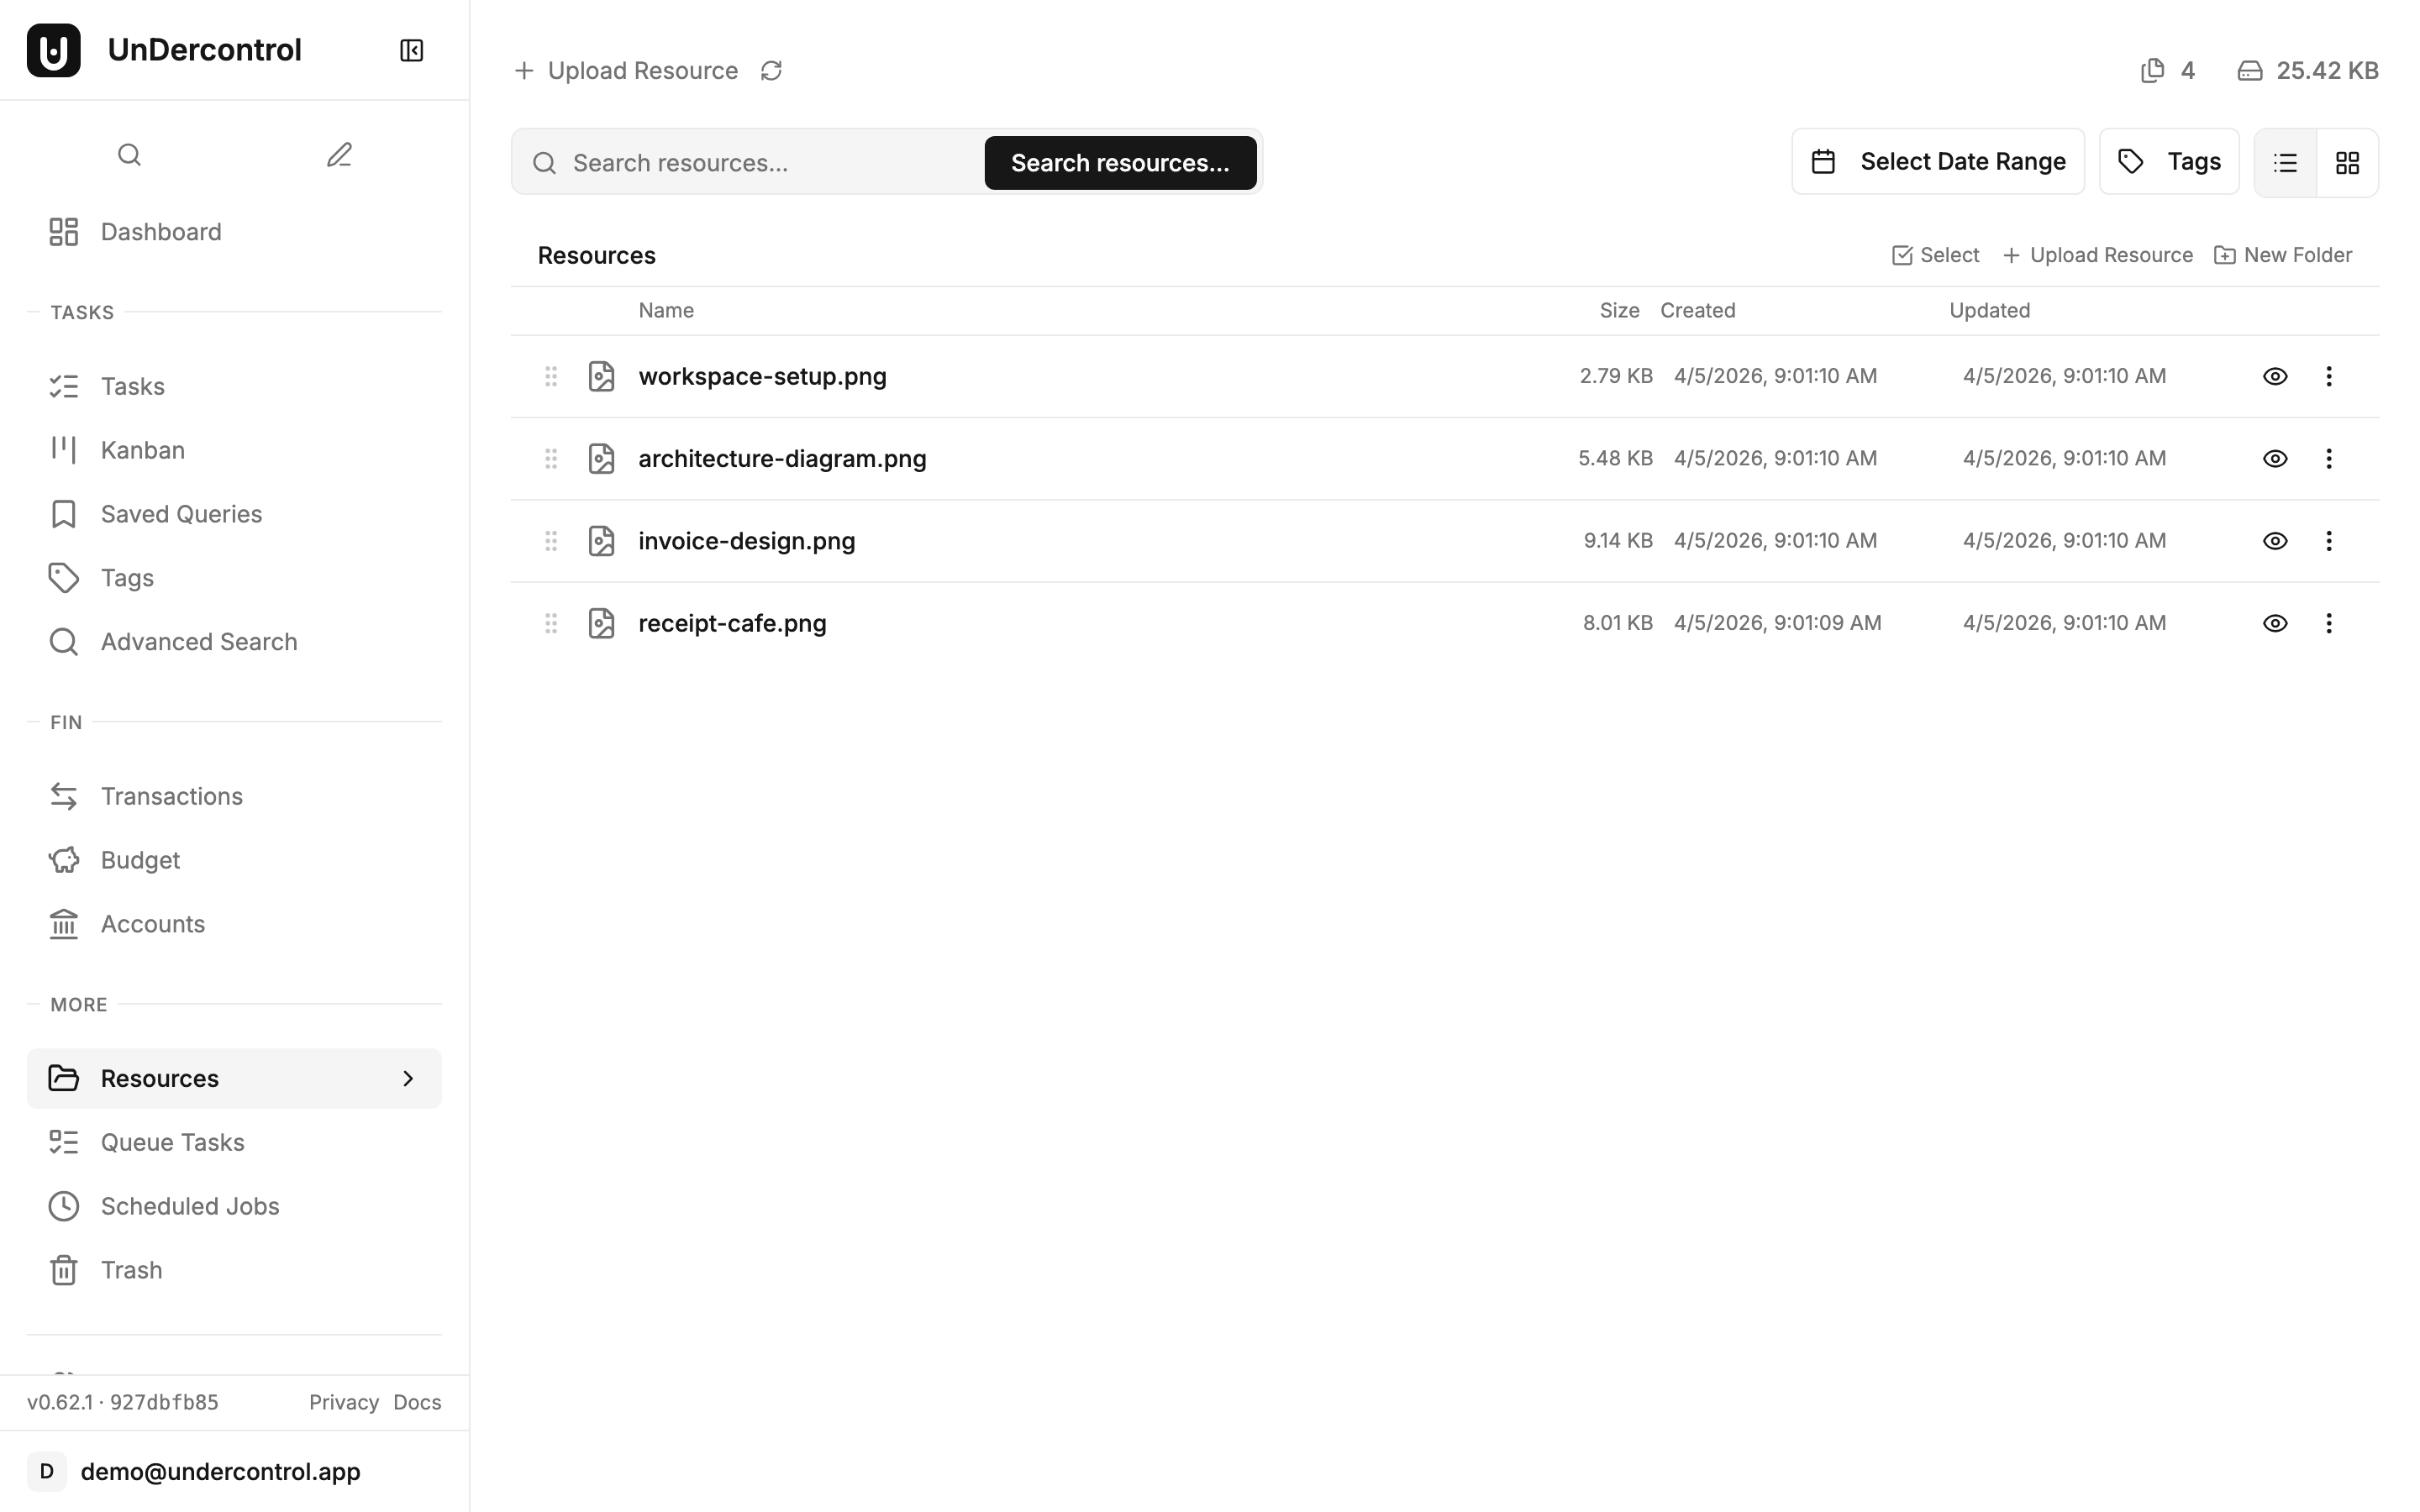
Task list view — files attach directly to tasks, expenses, and budgets

Find What You Need

The Resources page gives you a full overview of uploaded files with filtering built in. You can narrow down by file type, by which entity type the file is attached to (tasks, expenses, budgets, accounts), or by a date range. For images, the gallery view shows thumbnails so you can visually scan a set of receipts or screenshots without opening each one.

Resource management page showing uploaded files with thumbnails and metadata

The inspector also surfaces EXIF metadata for photos — useful if you need to confirm when a photo was taken or where.

Storage: Local or S3

Because UnDercontrol is self-hosted, you control where your files are stored. The default is local disk storage, which works fine for personal use on a home server or VPS. For larger setups or remote access, you can configure S3-compatible object storage — AWS S3, Backblaze B2, MinIO, whatever you already have.

The key point: your files do not flow through a third-party service. They go from your browser to your server.

Storage limits are configurable. Regular users get 1 GB and a 10 MB per-file cap by default. Admins can operate without limits.

Drawio Diagrams, In-App

If your workflow involves system diagrams, flow charts, or architecture sketches, UnDercontrol includes built-in drawio support. You can create and edit diagrams directly in the app. No export-to-PNG, no switching to a separate tool and re-uploading. The diagram file lives as a resource attached to whatever task or note it belongs to.

AI on Images

For receipts and document scans, the AI integration is worth knowing about. You can open an image resource and ask the AI to extract information from it — line items from a receipt, text from a scanned form. This feeds naturally into the expense tracking workflow: photograph a receipt, attach it to an expense, and let the AI pull out the amount and merchant name.

What This Looks Like Day-to-Day

A practical example: you are tracking a freelance project. There is a task for "Review client contract." You attach the contract PDF to that task. Later, you log an expense for software you purchased for the project. You attach the invoice to the expense. Both files show up in the Resources page, filtered by entity type if you want to see only expense attachments, or together if you want a full file audit for the project.

Everything is in one place. No external file hosting, no email threads to dig through.

Budget overview — receipts and invoices attach to expenses within budgets

Get Started

If you are already running UnDercontrol, the Resources page is available in the main navigation. If you are evaluating whether to self-host, the deployment guide covers setting up your instance including storage configuration.

The Resource Management documentation has the full reference for CLI commands, storage configuration, and entity attachment options.

Own Your Data with Self-Hosting

· 5 min read
Creator of UnDercontrol

There is a certain kind of frustration that builds slowly. You sign up for a productivity app, migrate your tasks and finances into it, build habits around it — and then one day the pricing changes, the company pivots, or worse, the service shuts down. Your data is gone or locked behind an export button that produces something barely usable.

UnDercontrol was built from the start to avoid that situation entirely. It is self-hosted, which means you run it on infrastructure you control, and your data lives wherever you put it.

Deploy in Minutes with Docker Compose

For most people, Docker Compose is the fastest path to a running instance. A single docker-compose.yml file pulls the backend and frontend images, wires them together, and has UnDercontrol running on your server or local machine in a few minutes.

A minimal setup looks roughly like this: a backend service with your data directory mounted as a volume, a frontend service pointing at it, and an optional reverse proxy like Caddy or Nginx in front. That is genuinely all there is to it for a single-user or small household deployment. No managed cloud accounts, no API keys to a third-party service, no data leaving your network.

The Docker image is designed to be small and predictable. It does not phone home, it does not require an internet connection after the initial pull, and it stores everything in the paths you configure.
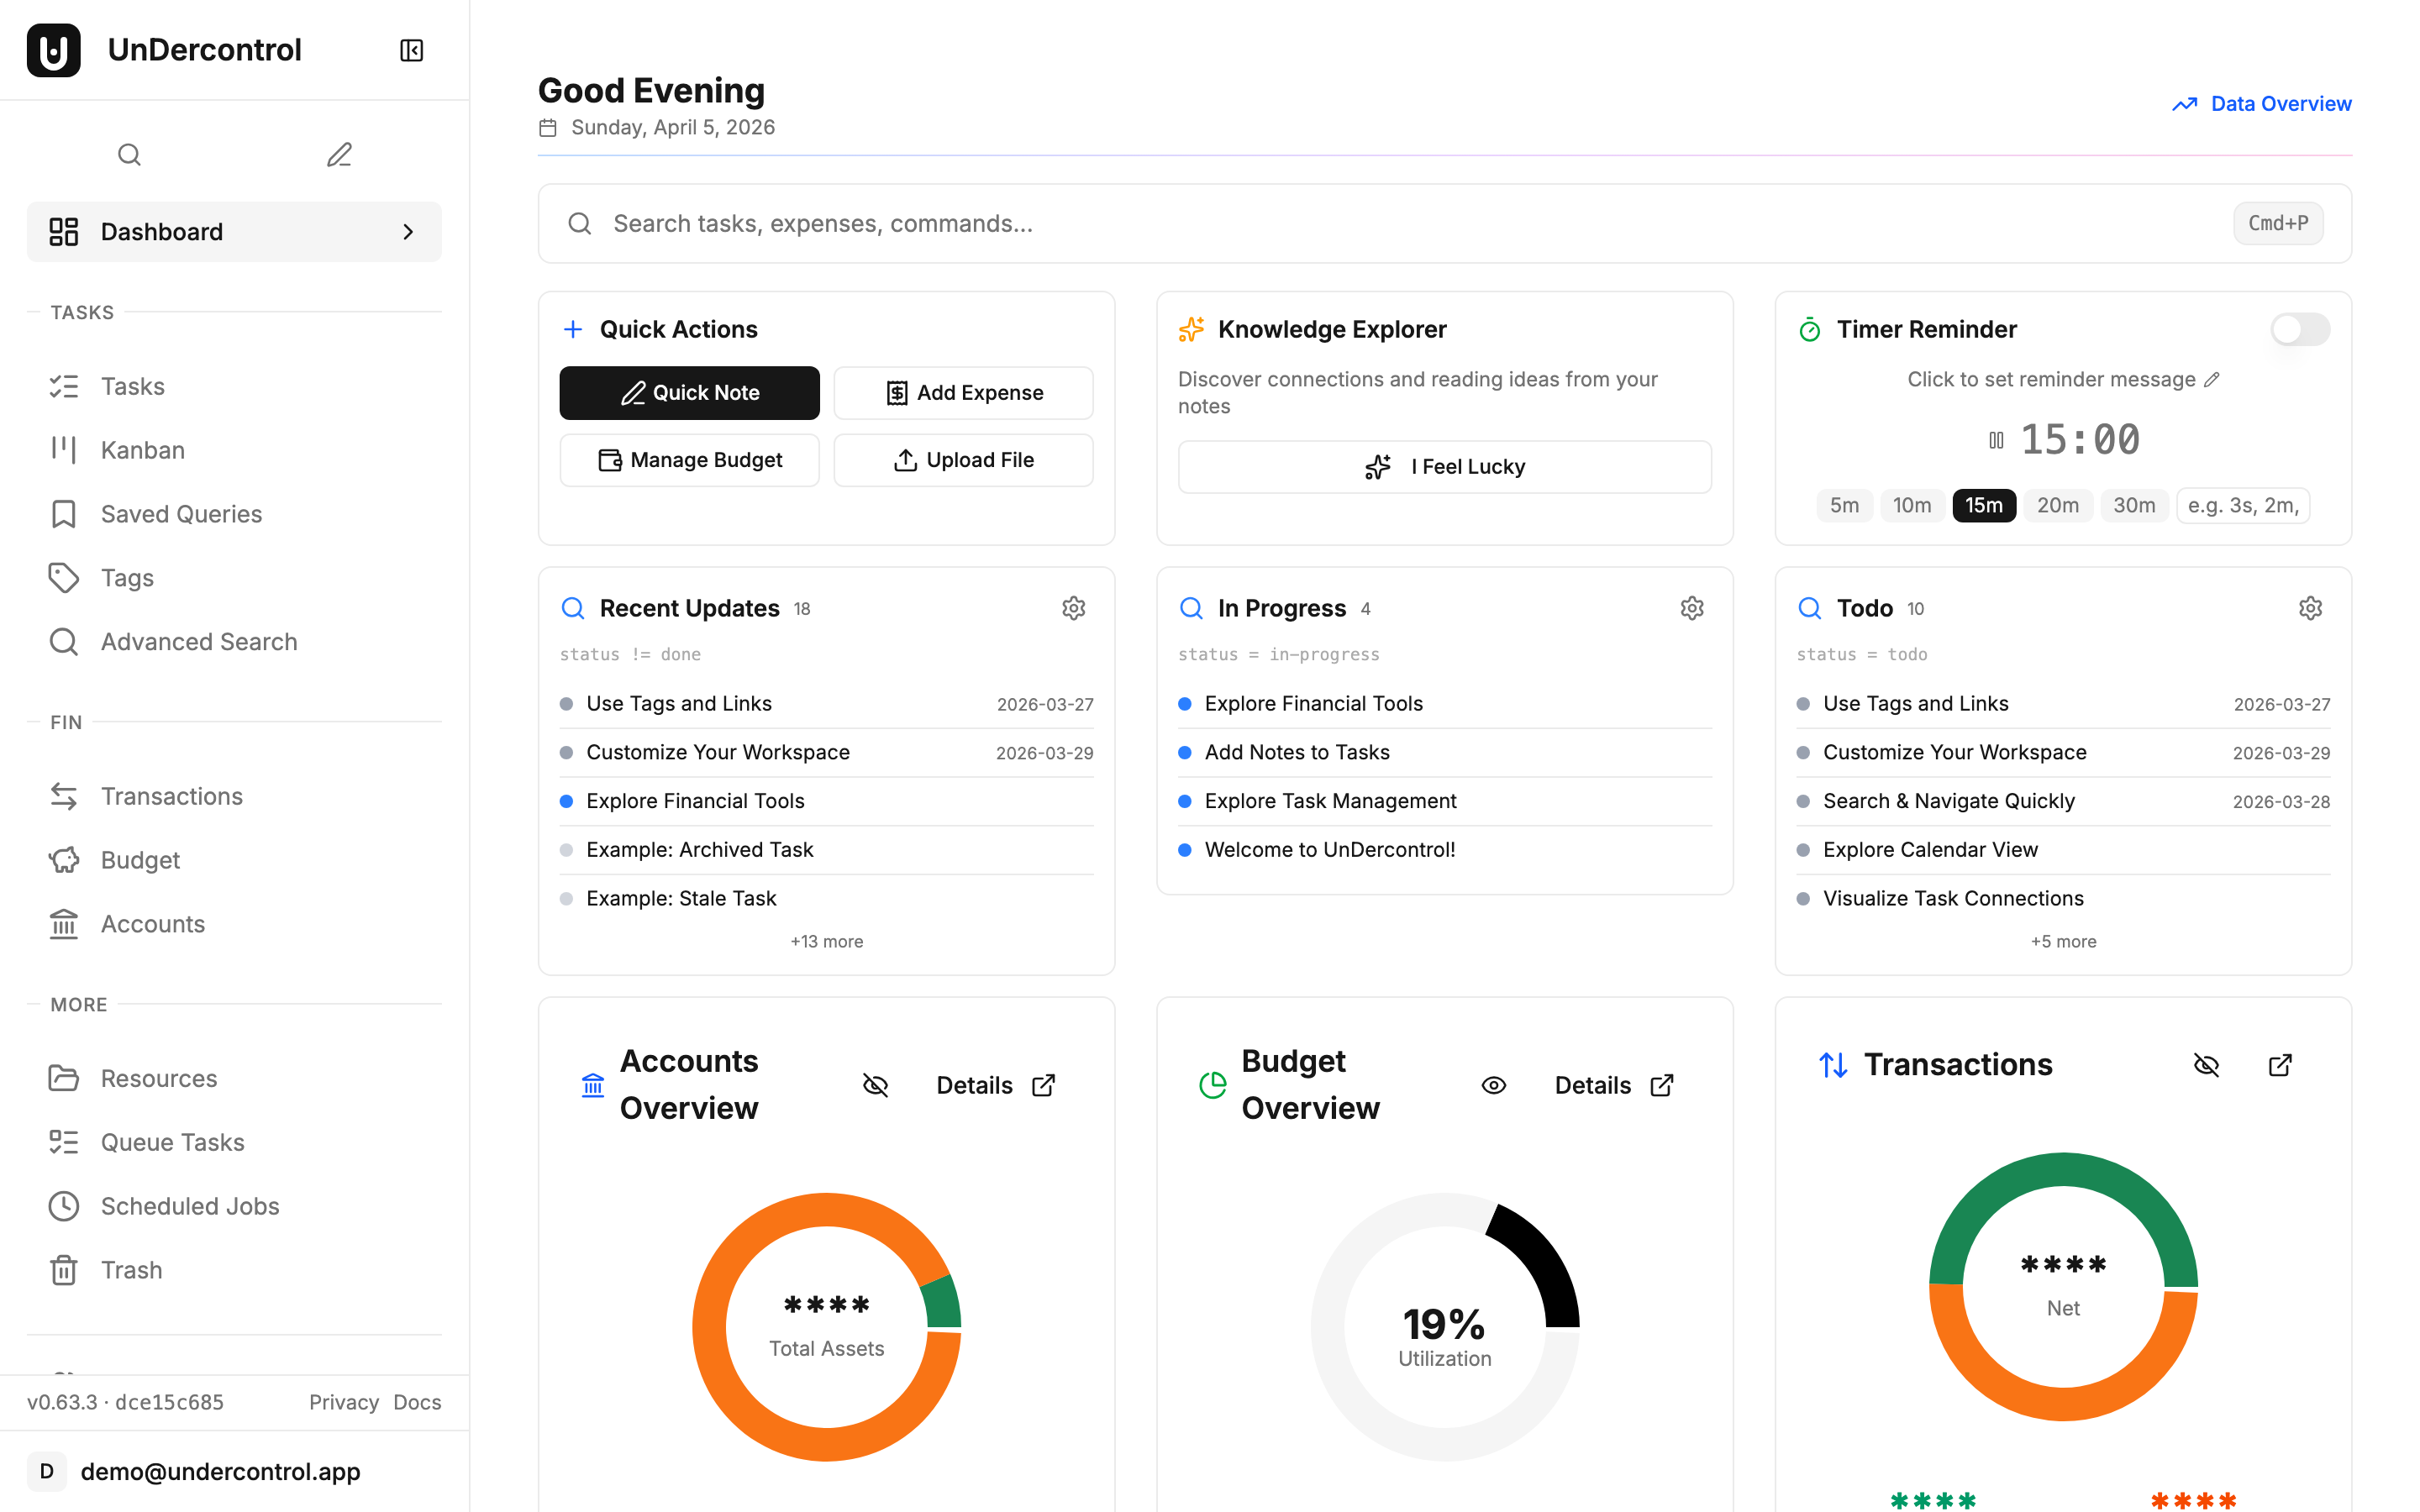
UnDercontrol dashboard — self-hosted and fully under your control

Kubernetes for Teams and Power Users

If you are running a homelab with Kubernetes, or you want the kind of reliability that comes with proper orchestration, UnDercontrol ships with Kubernetes manifests as well. You get standard Deployments and Services, PersistentVolumeClaims for your data, and ConfigMaps for environment-specific settings.

This is particularly useful if you are deploying UnDercontrol for a small team — a family, a group of friends, a small company — where you want proper resource limits, rolling updates, and the ability to scale the backend independently if needed. Kubernetes also makes it straightforward to add ingress rules, TLS termination, and namespace-level isolation.

SQLite or PostgreSQL — Pick What Fits

One of the practical decisions UnDercontrol makes easy is choosing your database. For a single user or a small number of users, SQLite is the default and it works extremely well. There is no database server to manage, no connection pooling to configure, and backups are as simple as copying a file. SQLite is surprisingly capable under these conditions, and it keeps the operational overhead close to zero.

When you need more — concurrent users, larger datasets, integration with existing database infrastructure — switching to PostgreSQL is a matter of changing your environment variables and running migrations. The schema is identical across both backends. You do not have to redesign anything; you just point the application at your Postgres instance and it works.

This flexibility matters because your needs change over time. Starting with SQLite and migrating later is a supported path, not an afterthought.

What Full Data Ownership Actually Means

Self-hosting means your tasks, your financial records, your uploaded files, and your AI conversation history all live on storage you control. If you want to move to a different server, you copy your data directory and update your deployment. If you want to back up everything, you back up that directory. If you decide to stop using UnDercontrol entirely, your data is still there, in formats you can read.

There is no account to delete, no support ticket to file, no waiting period. The data is yours because it was always on your machine.

This also means you control who has access. Running UnDercontrol on a private network or behind a VPN means your finance data never touches the public internet unless you explicitly route it there. For people who track detailed budgets or sensitive personal information, that is not a small thing.

No Vendor Lock-in by Design

The backend API is documented and open. The CLI uses kubectl-style commands and works against the same API the web app uses. You can script against it, integrate it with other tools, or build your own clients. The task and note formats are designed to be portable.

The goal was always to build something that earns your continued use because it is genuinely useful — not because migrating away is too painful to bother with.

Get Started

The deployment guide covers Docker Compose setup, Kubernetes manifests, database configuration, and backup strategies in detail. If you have a server or a spare machine running, you can have a working instance today.

Check out the self-hosting documentation to get started, or open an issue on GitHub if something in the setup does not work the way you expect.